Home Theater
This
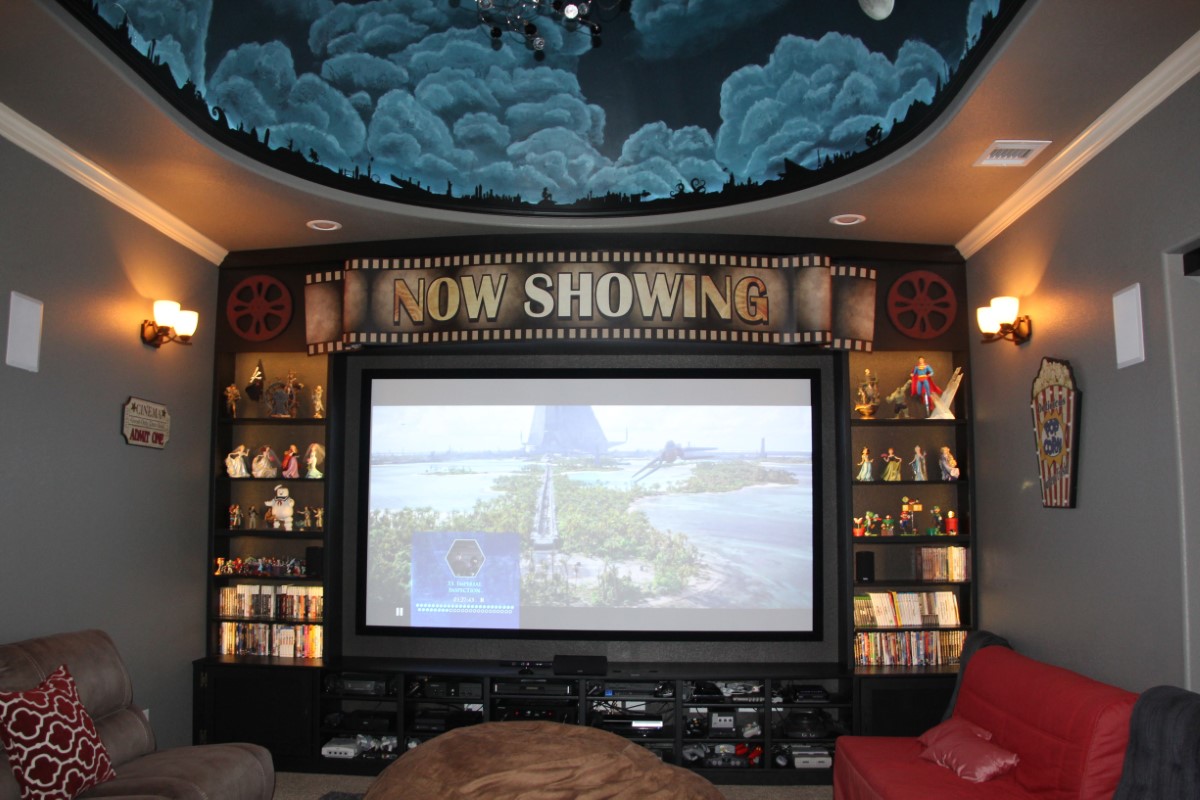
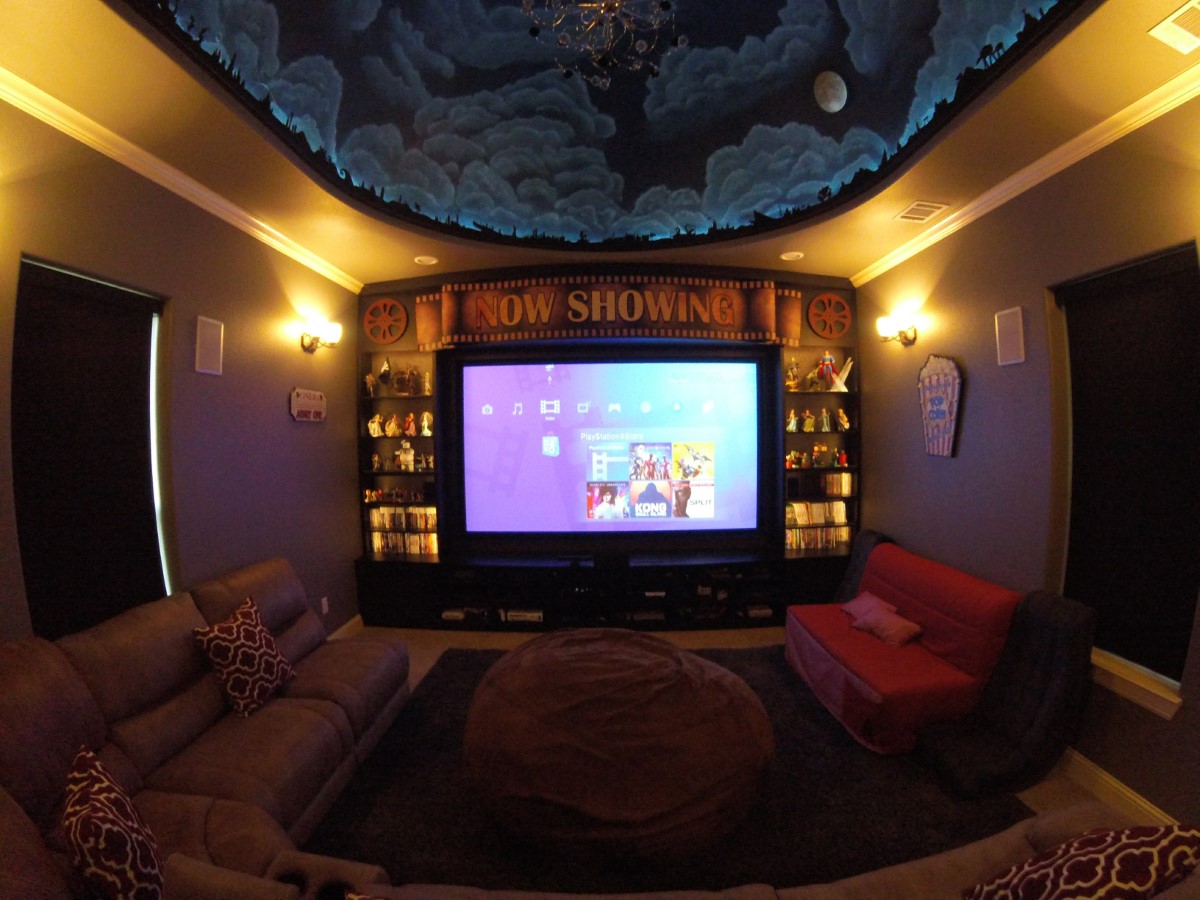
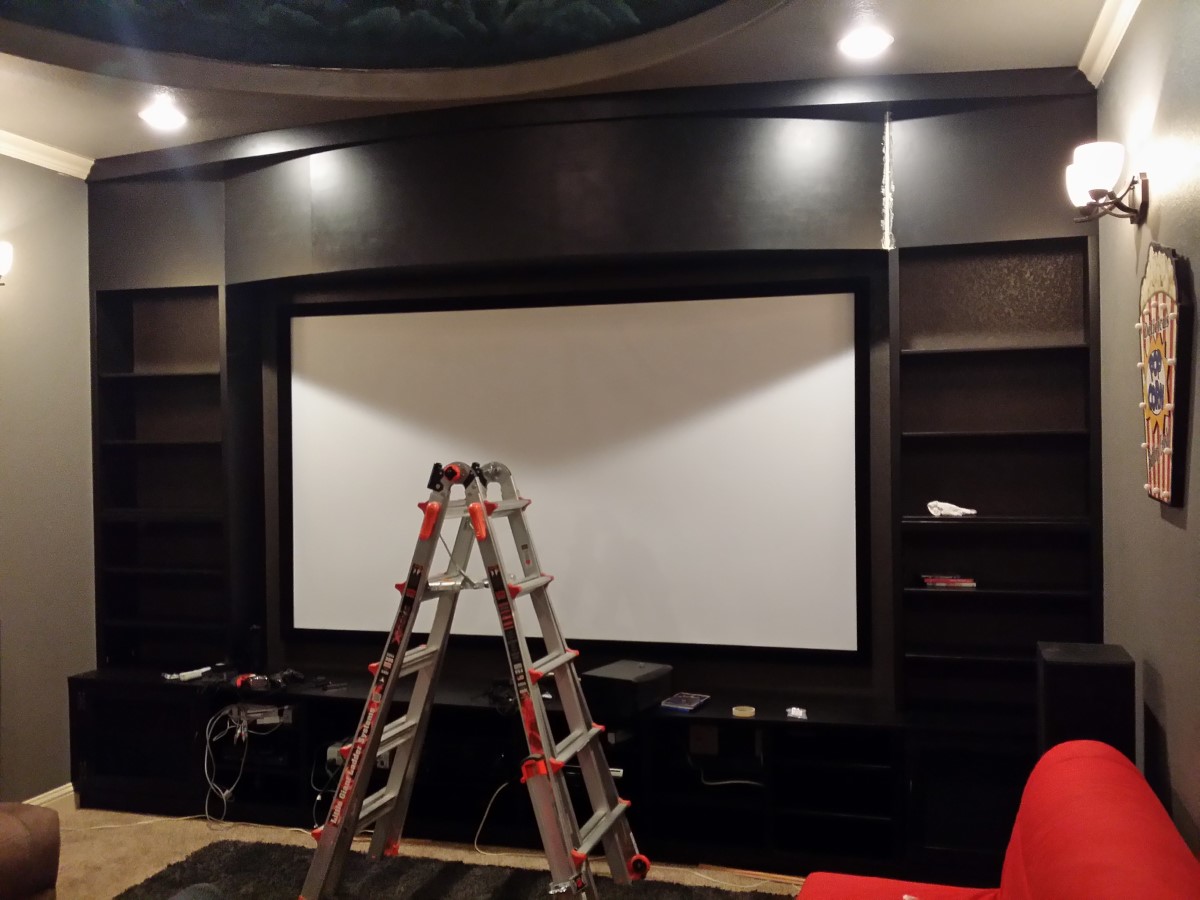
is our home theater. It took about 2 years on and off adding bits
at a time. Descriptions of the build are below.
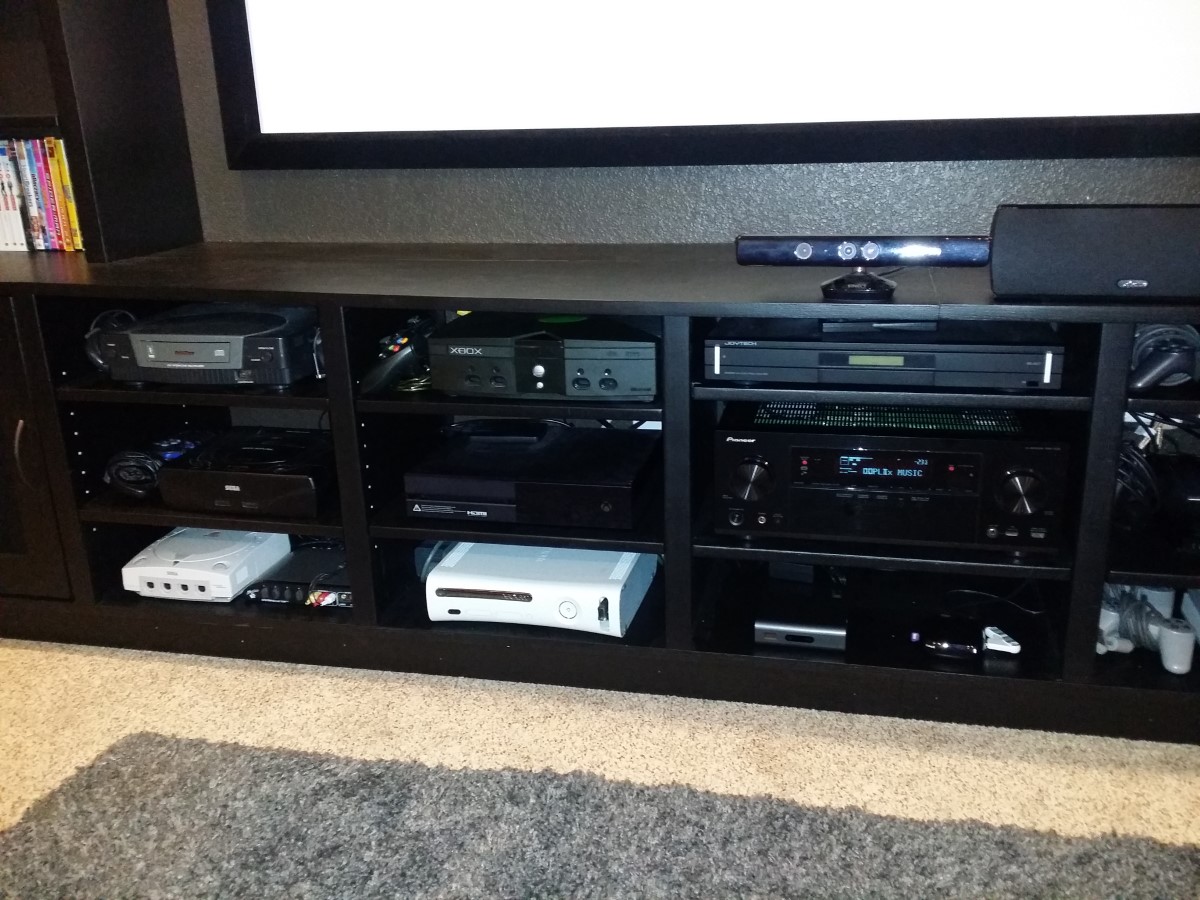
I may have misjudged how much stuff I have. I filled all of the shelves and had to return some of the old systems back to the dark dark closet.
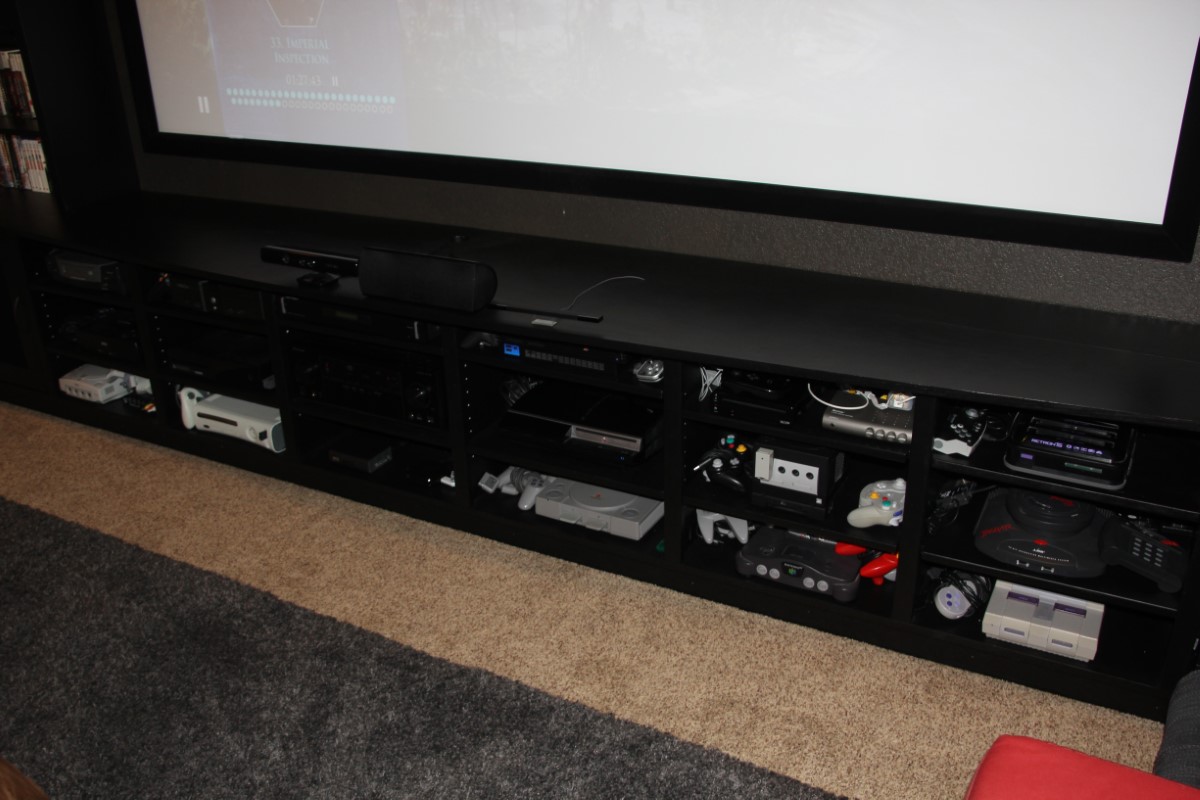
3DO, Xbox, Saturn, Xbox One, Dreamcast, Xbox 360, WDTv and Roku
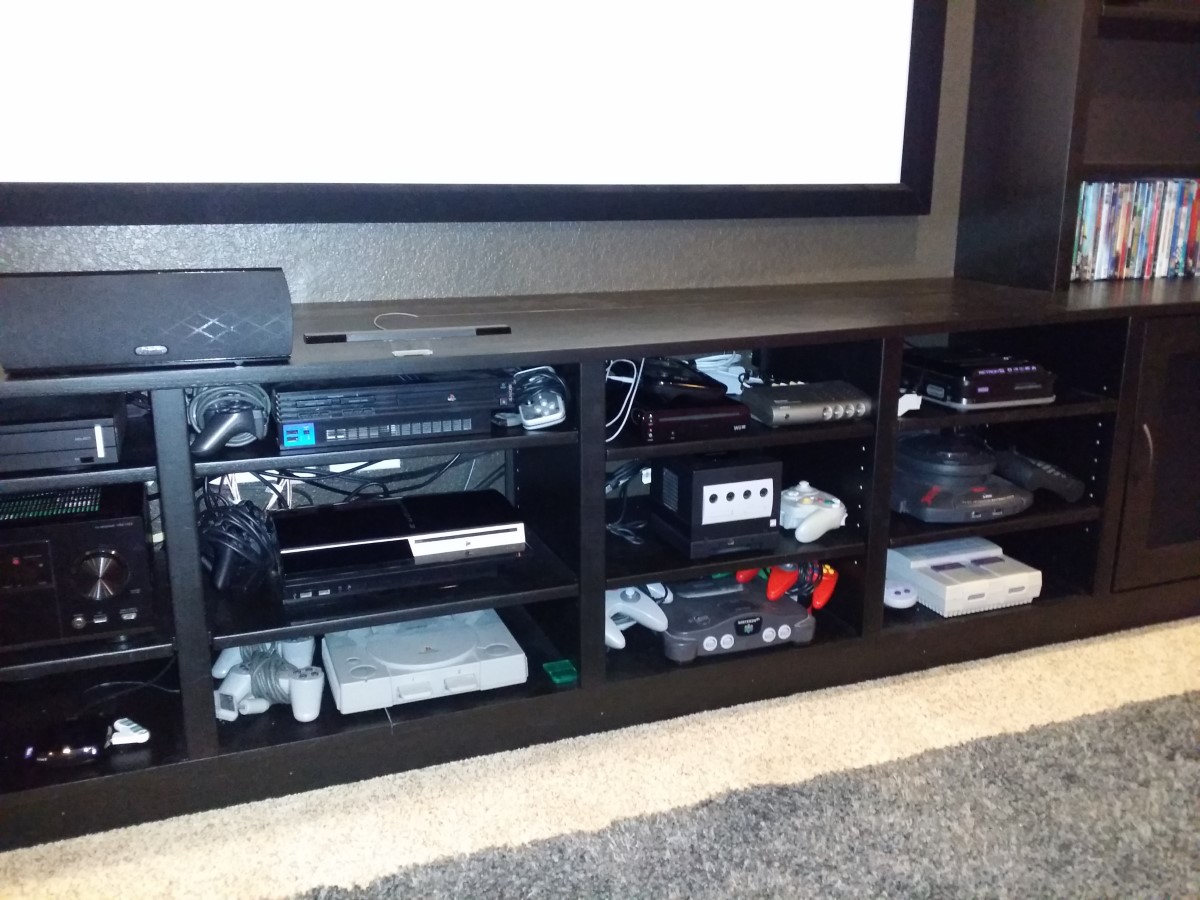
Playstation 2, WiiU, Retron 5, Playstation 3, Gamcube, Jaguar, Playstation, Nintendo 64 and Super Nintendo
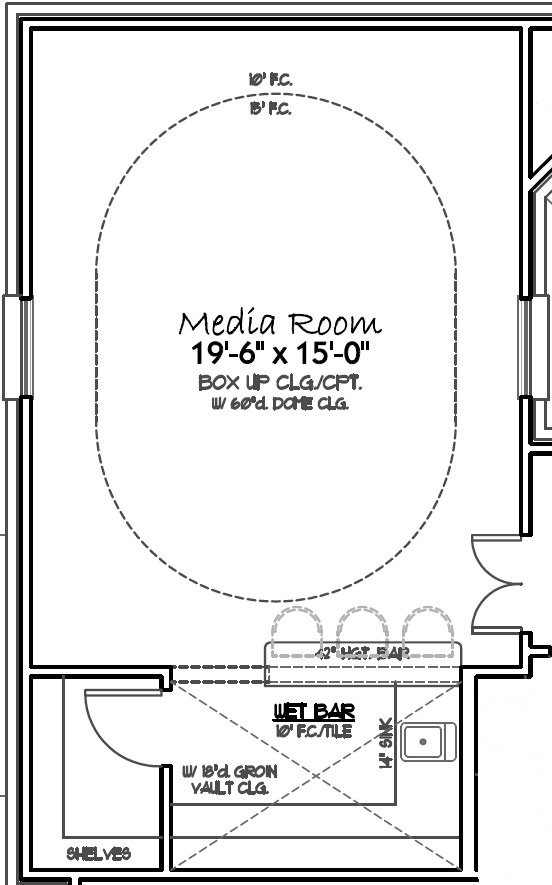
This the the floorplan of the house for the theater room.
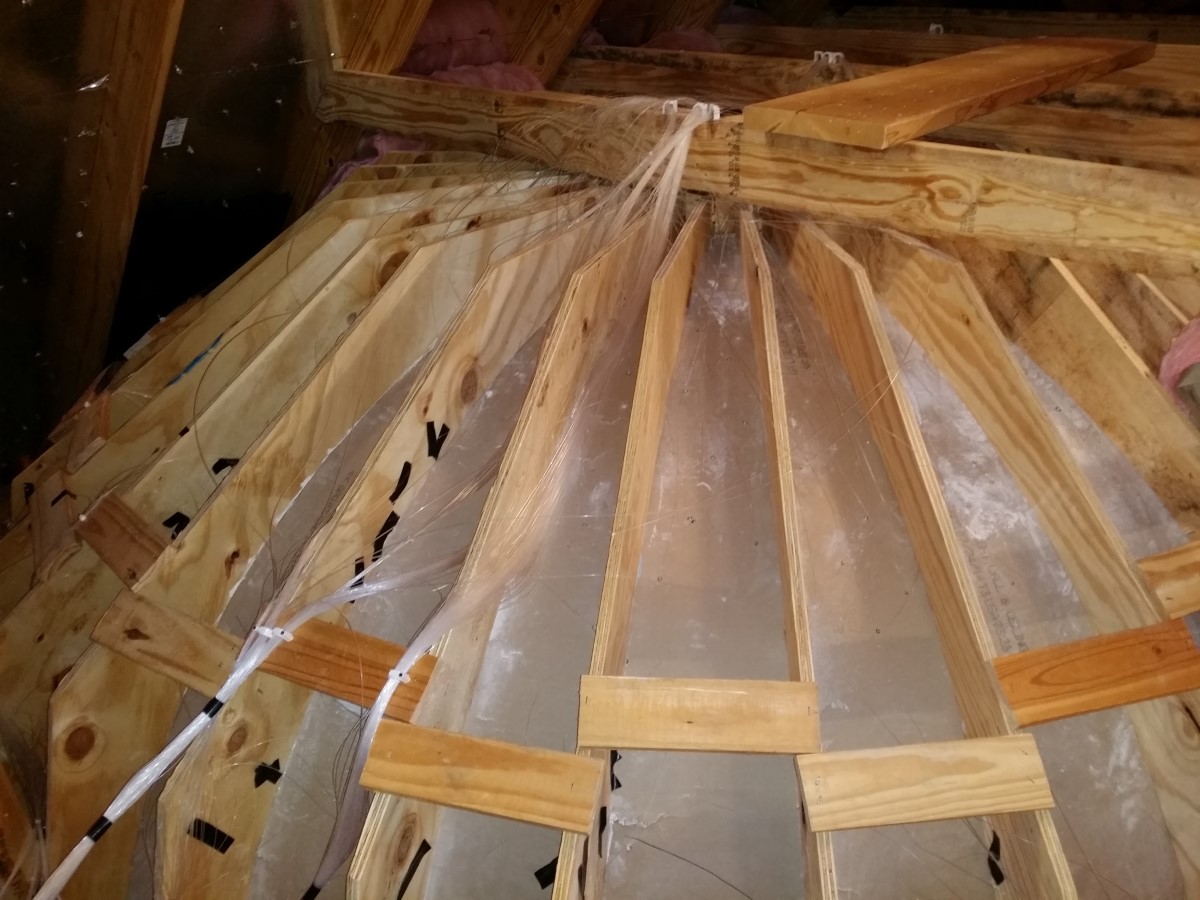
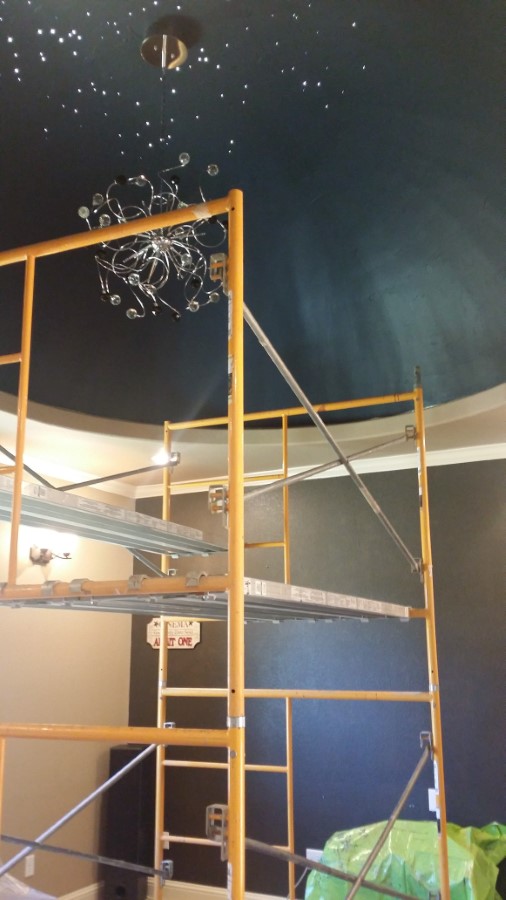
During construction we ran fiber optics to the dome from the bar ceiling. They light engine turns on from a switch on the wall.
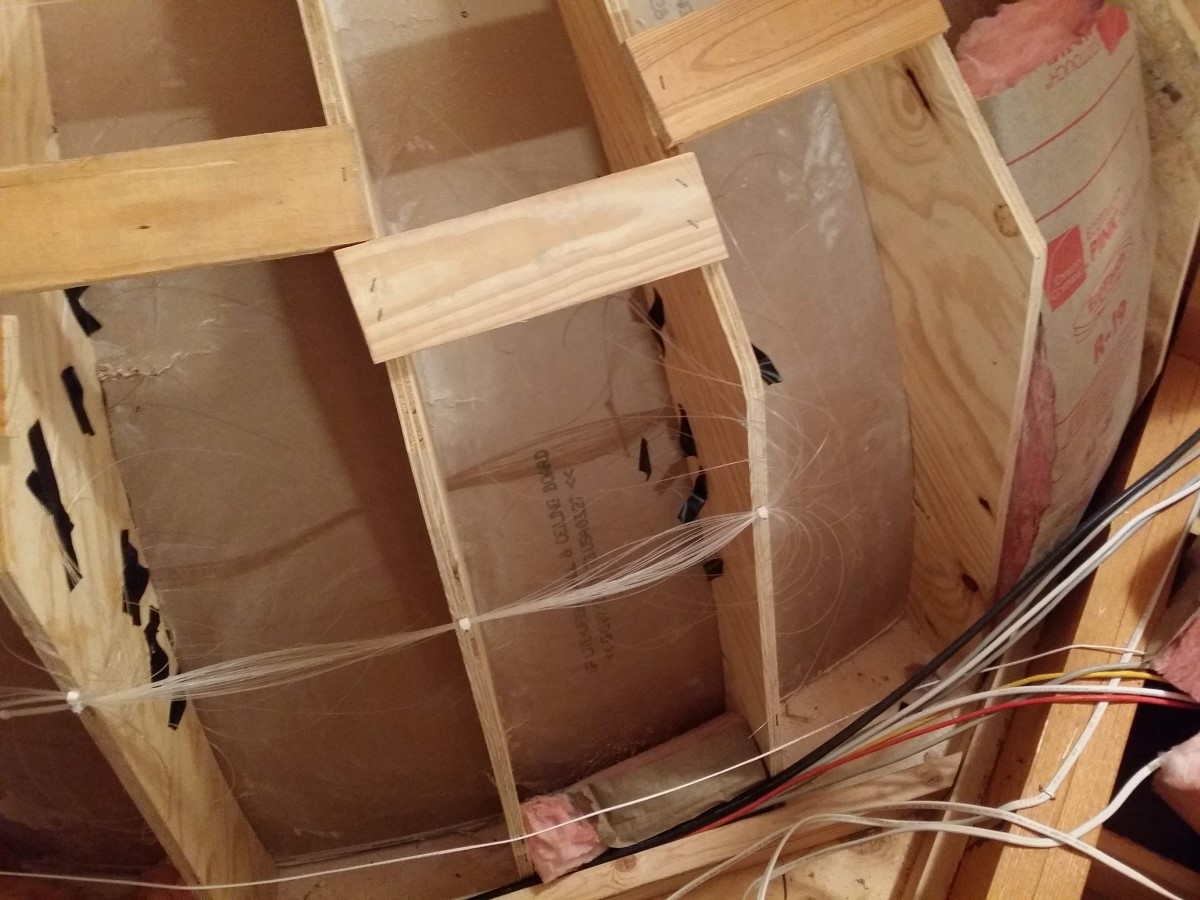
More fiber shown running to the dome. We made a mistake in the plan however, once the sheetrock was installed, we couldn't reach one side and front of the dome due to the roof line. So we decided to only run down the back and center so it keeps the stars out of the eye line when watching movies. We were able to fill in the missing area with clouds (below). It almost looks intentional :/
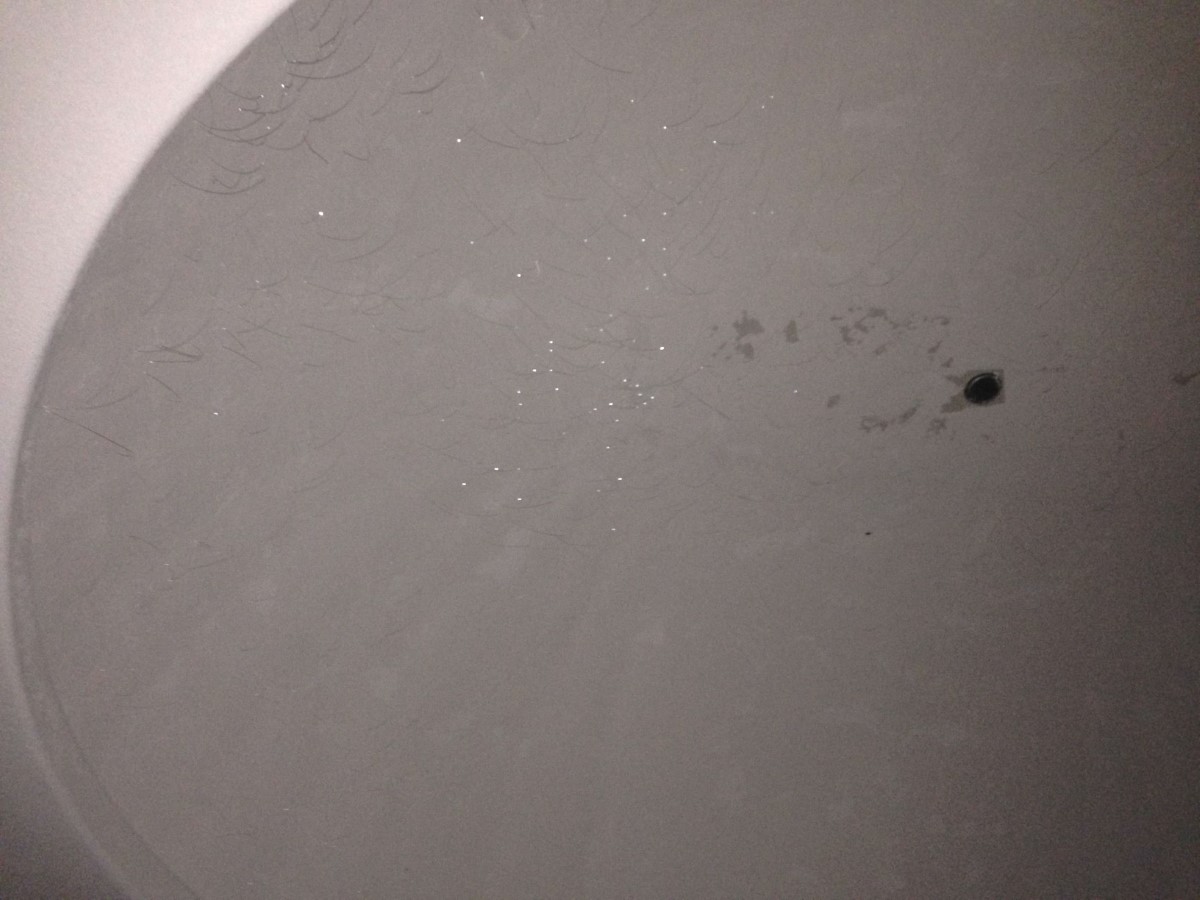
This is the fiber hanging through the holes on the udnerside before cutting and paint of the dome.
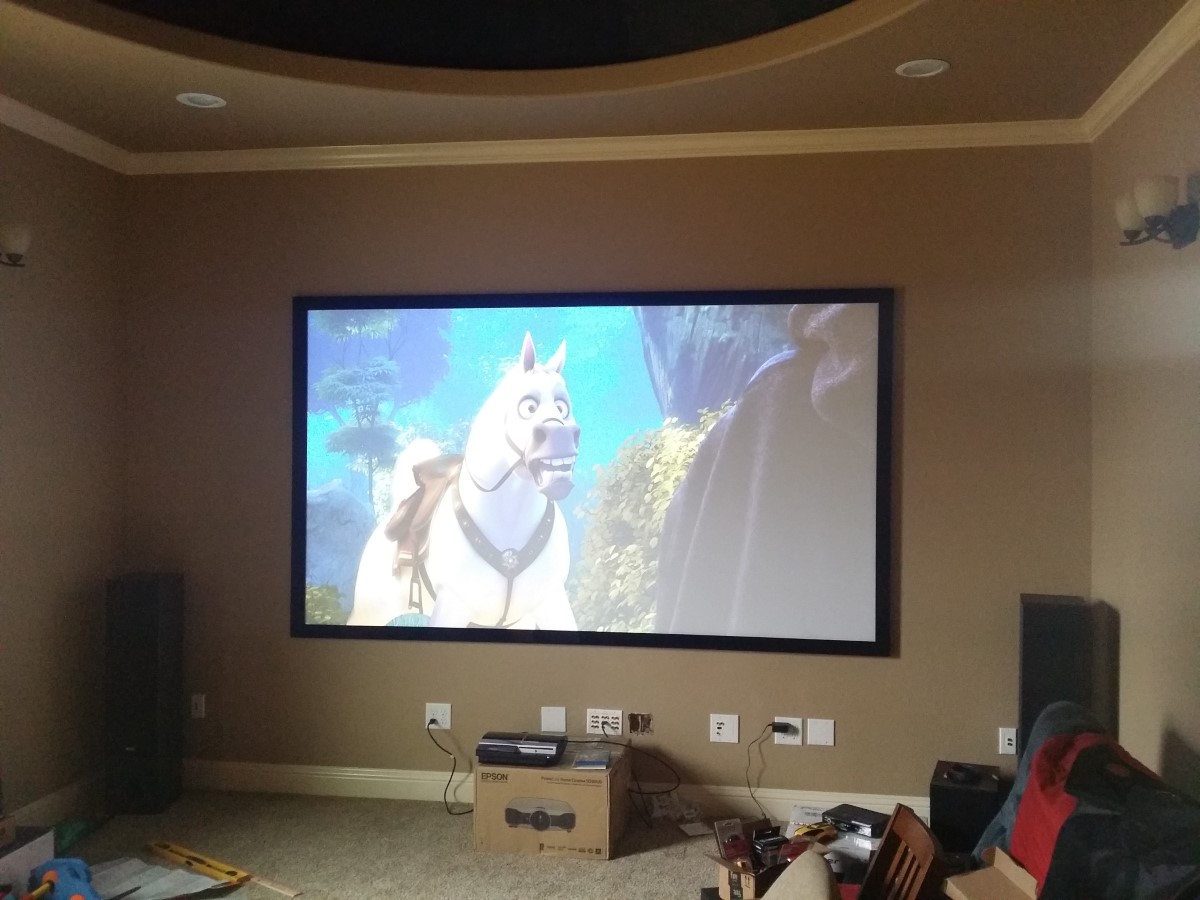
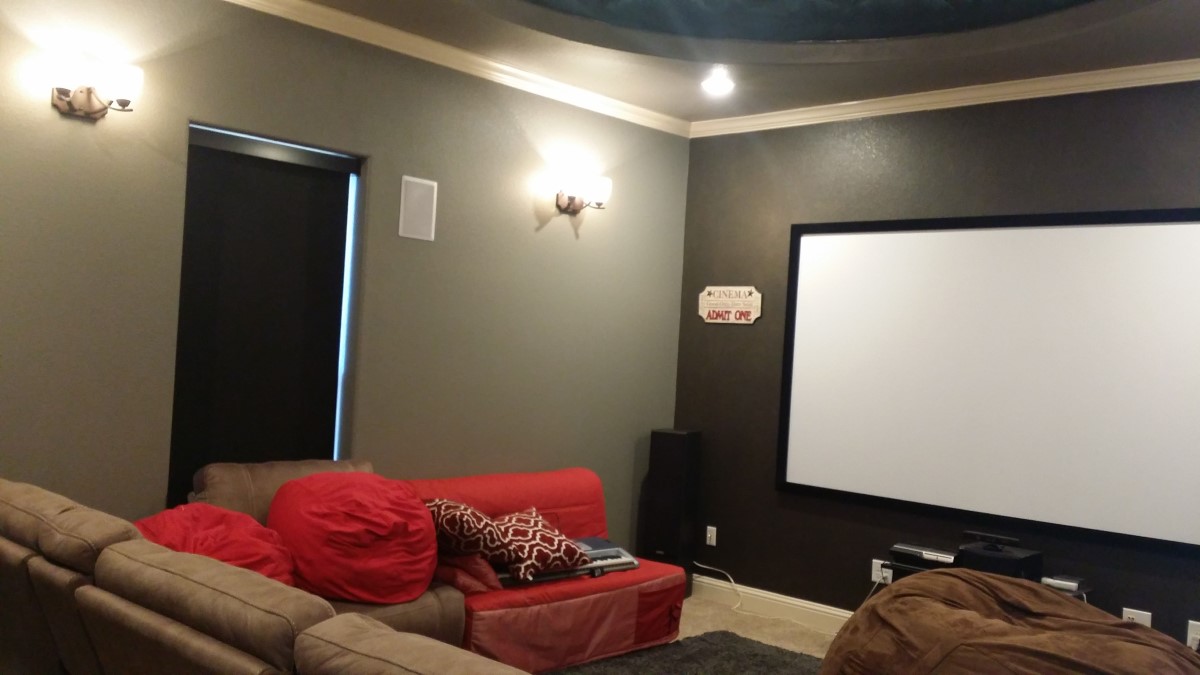
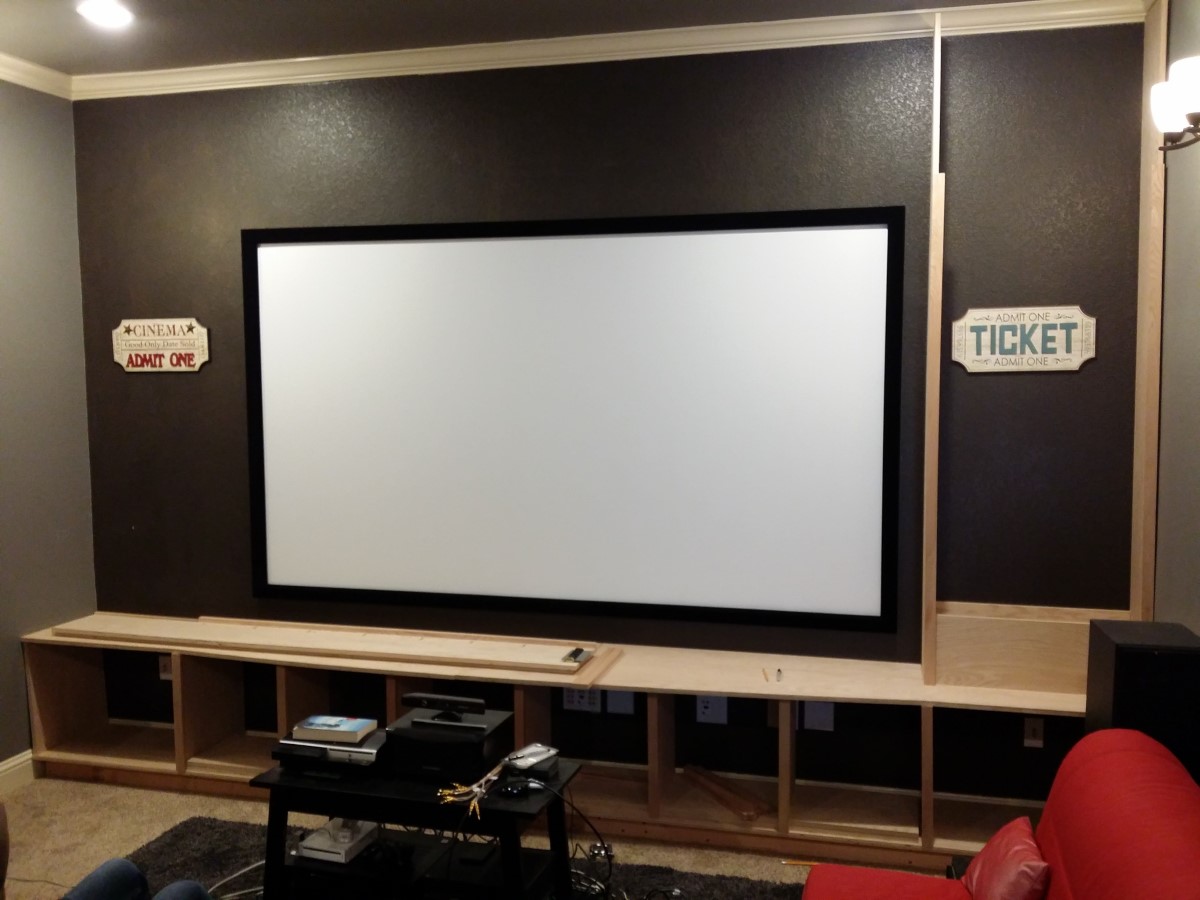
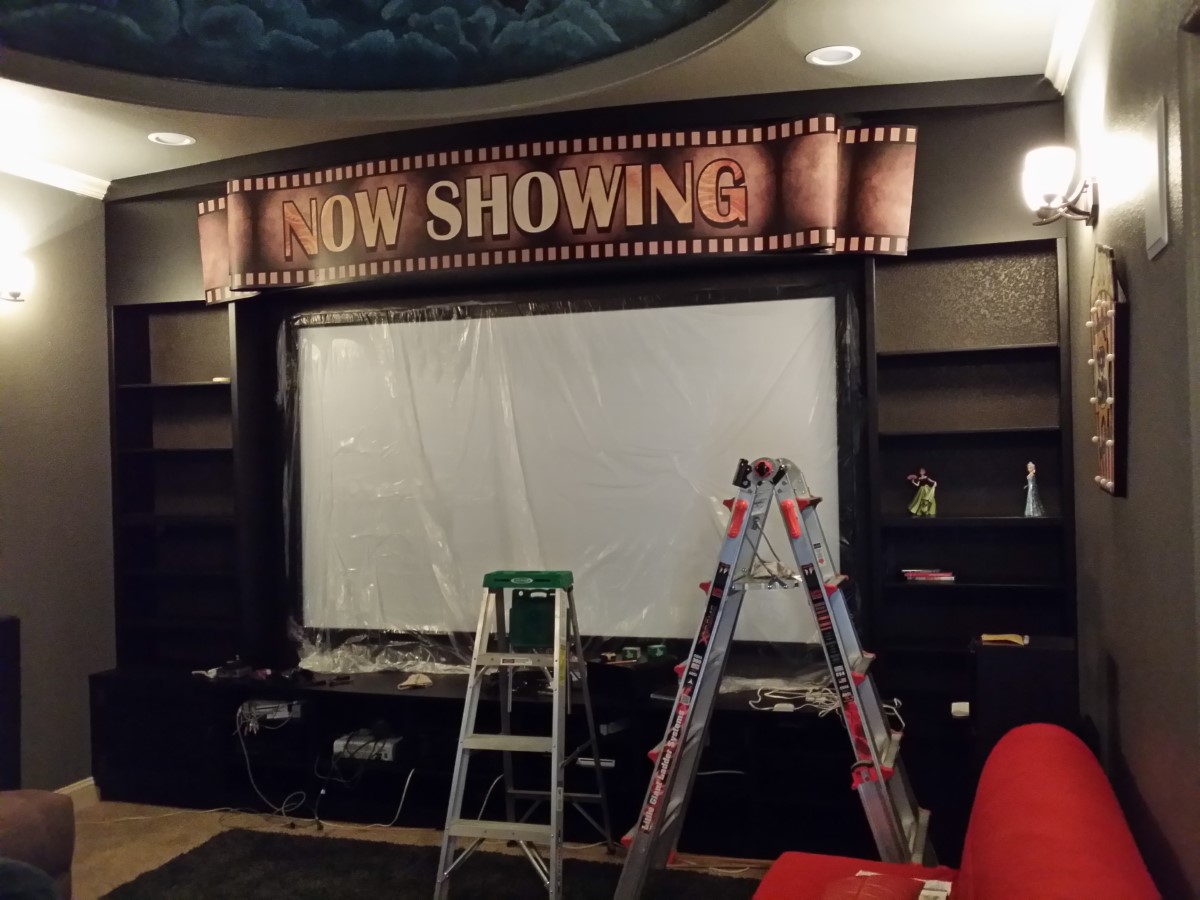
This is what we started with after temporarily putting up the screen.
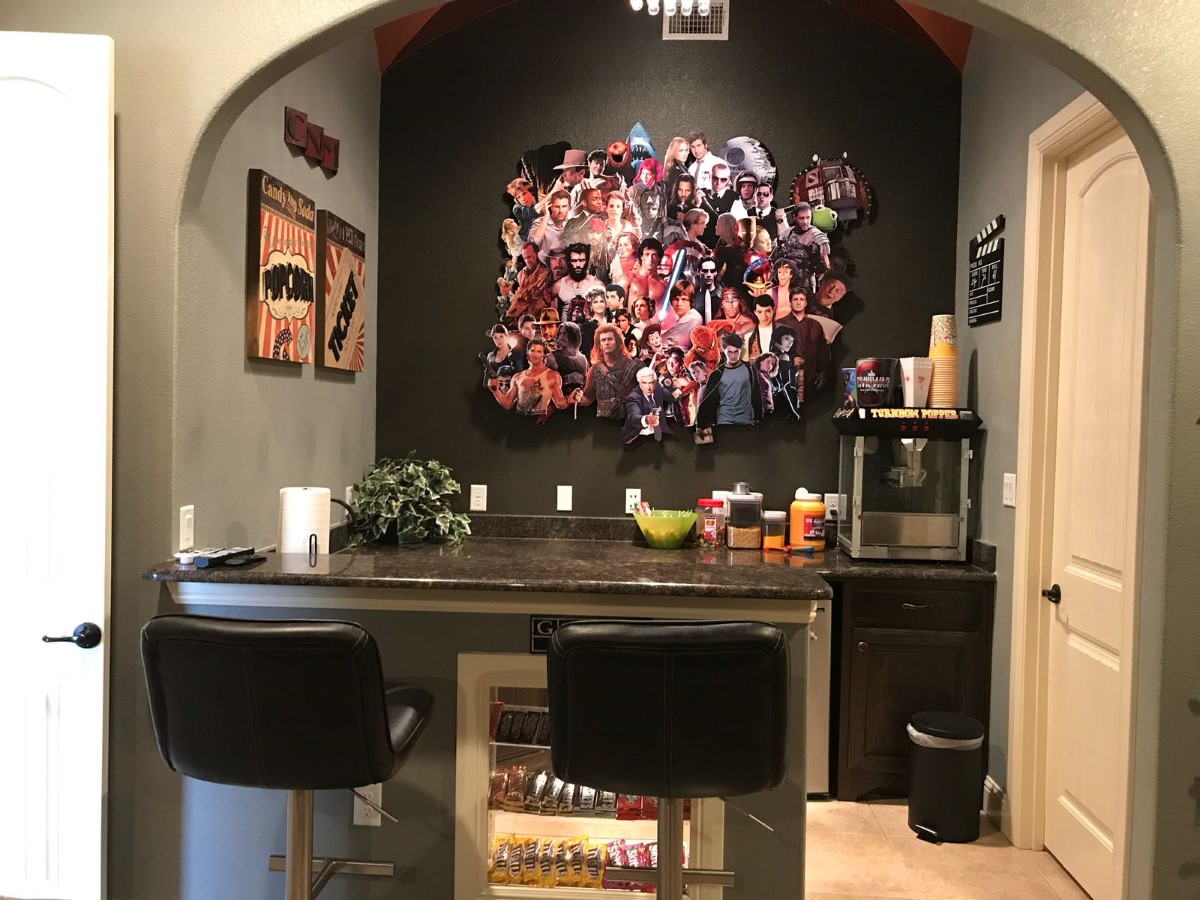
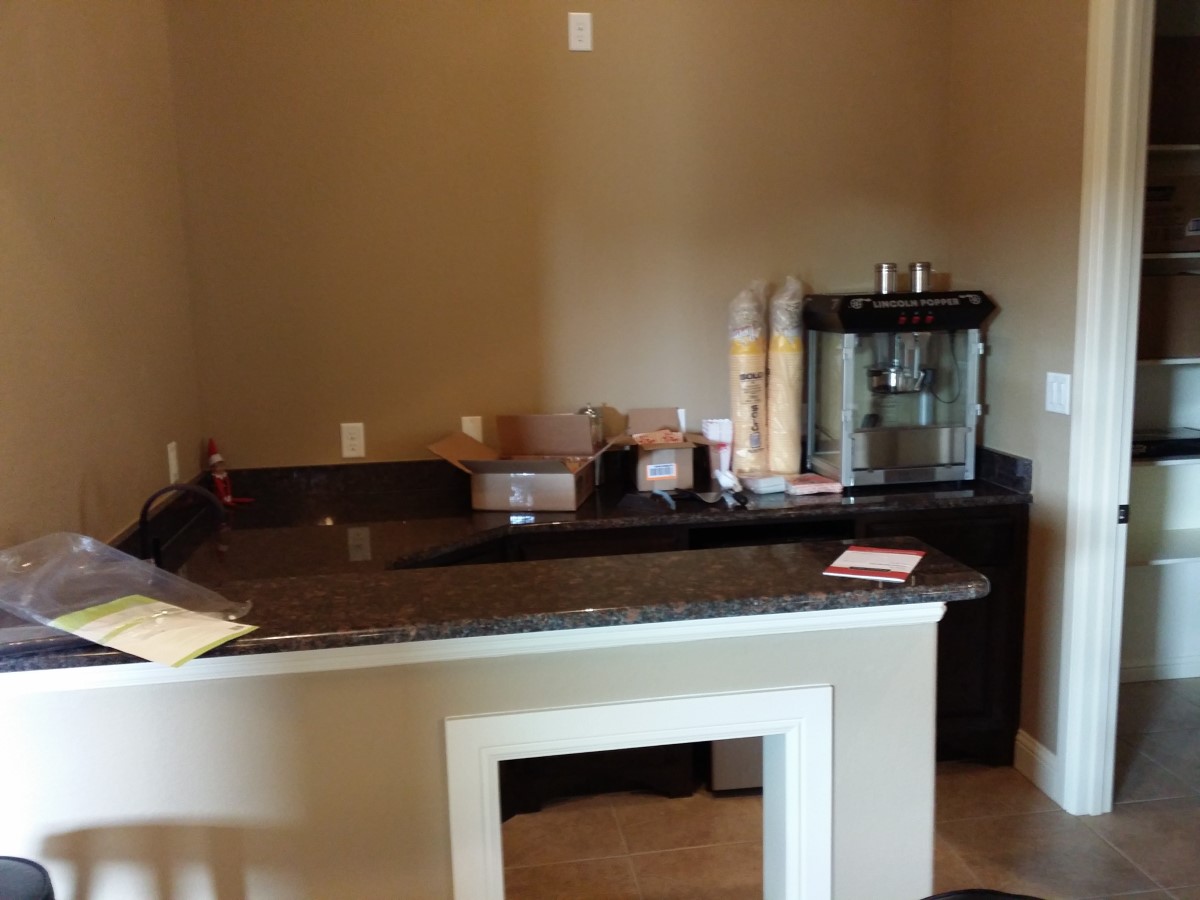
Starting picture of the bar area.
Room is repainted to dark brown and gray.
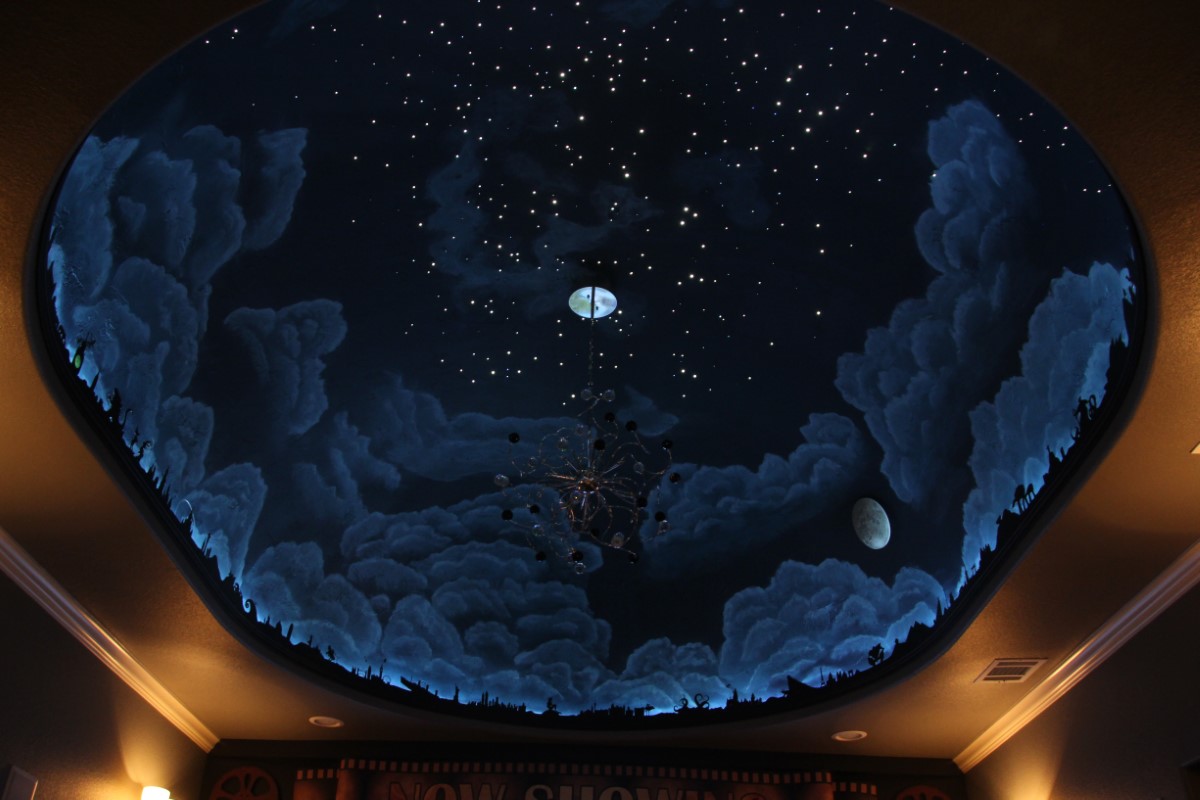
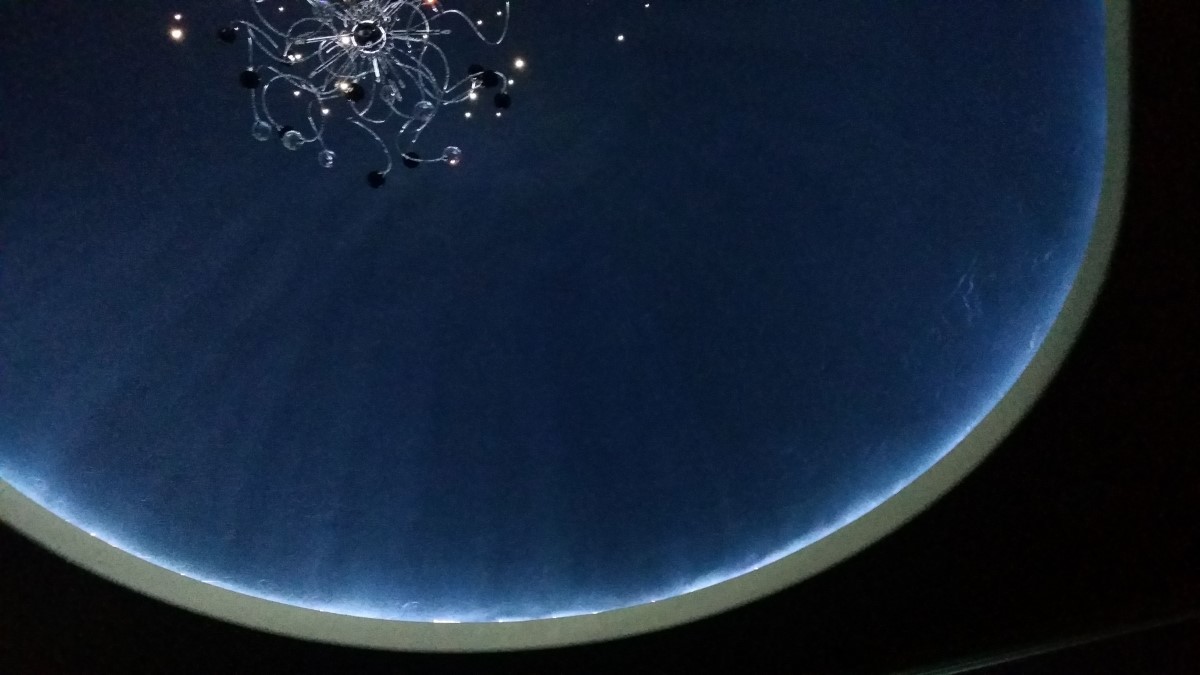
Dome is painted dark blue and rope light added around the perimeter. The rope light turns on from a switch on the wall. Unfortunately, you can see the rope light from the back of the theater in the bar. We fix this issue later by adding the silhouettes.
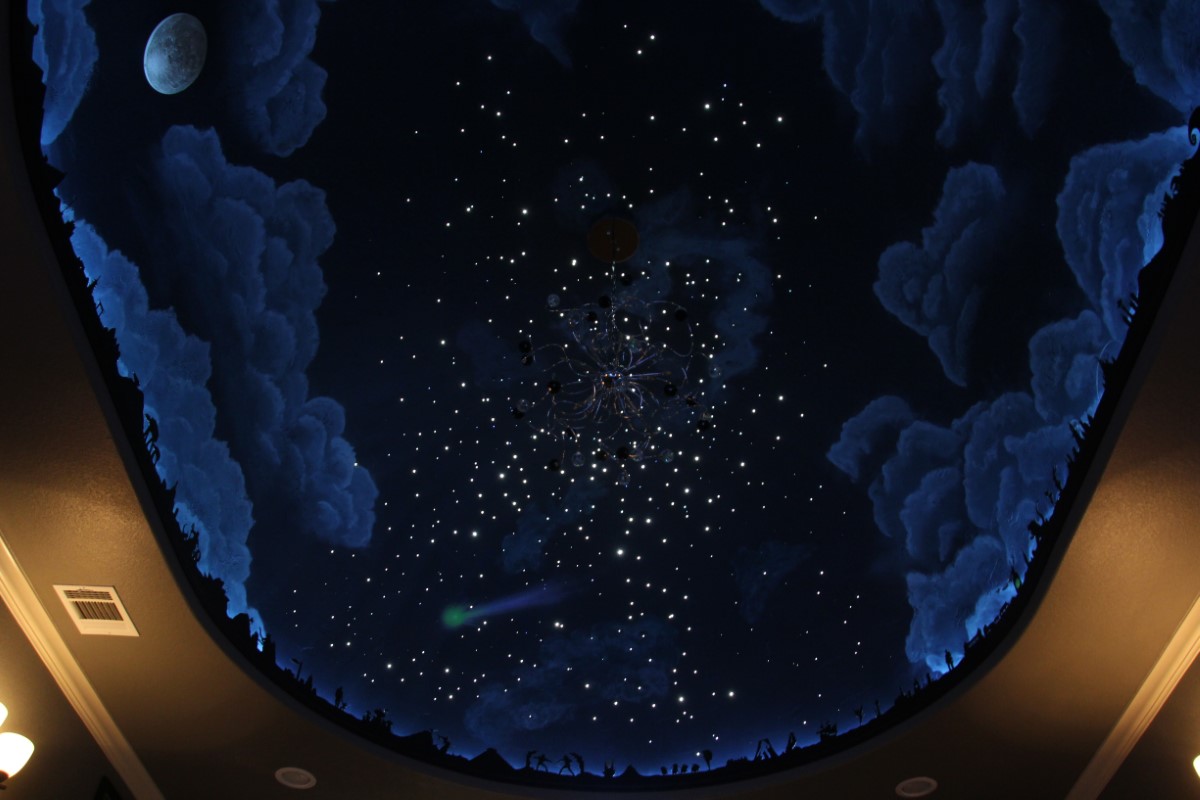
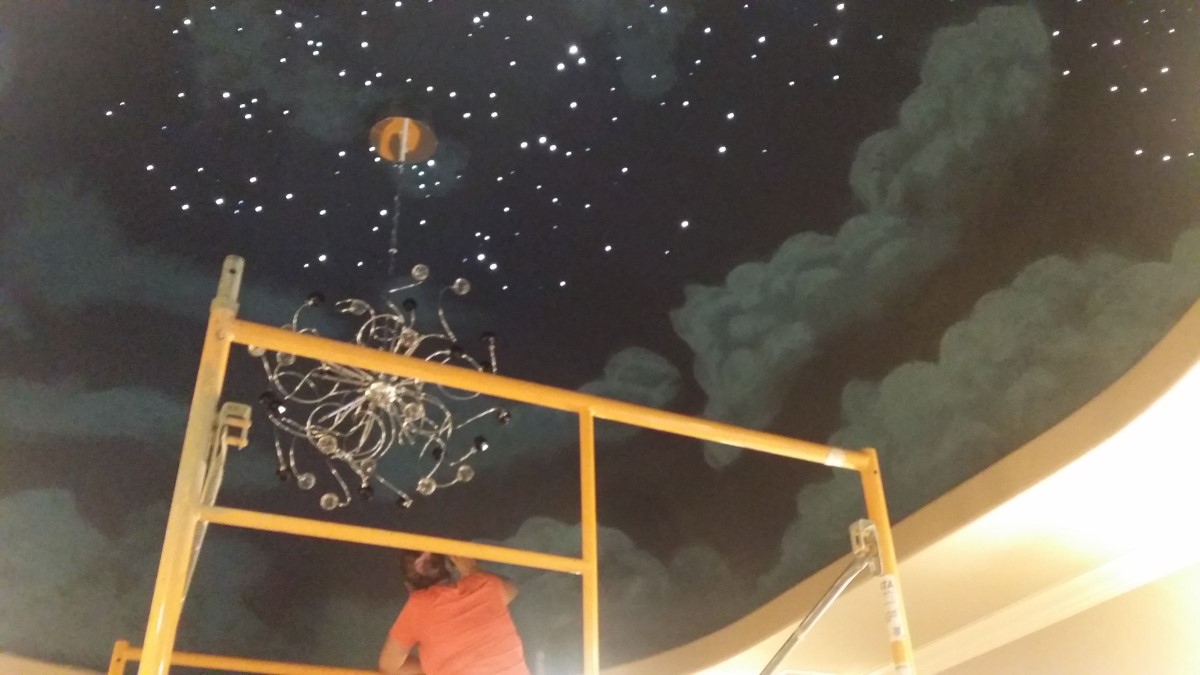
Cloud painting time! As it turns out, 15' is a long way up to reach on a ladder and move around. We rented scaffolding for this part. Operation hide the fiber lights mistake, go!
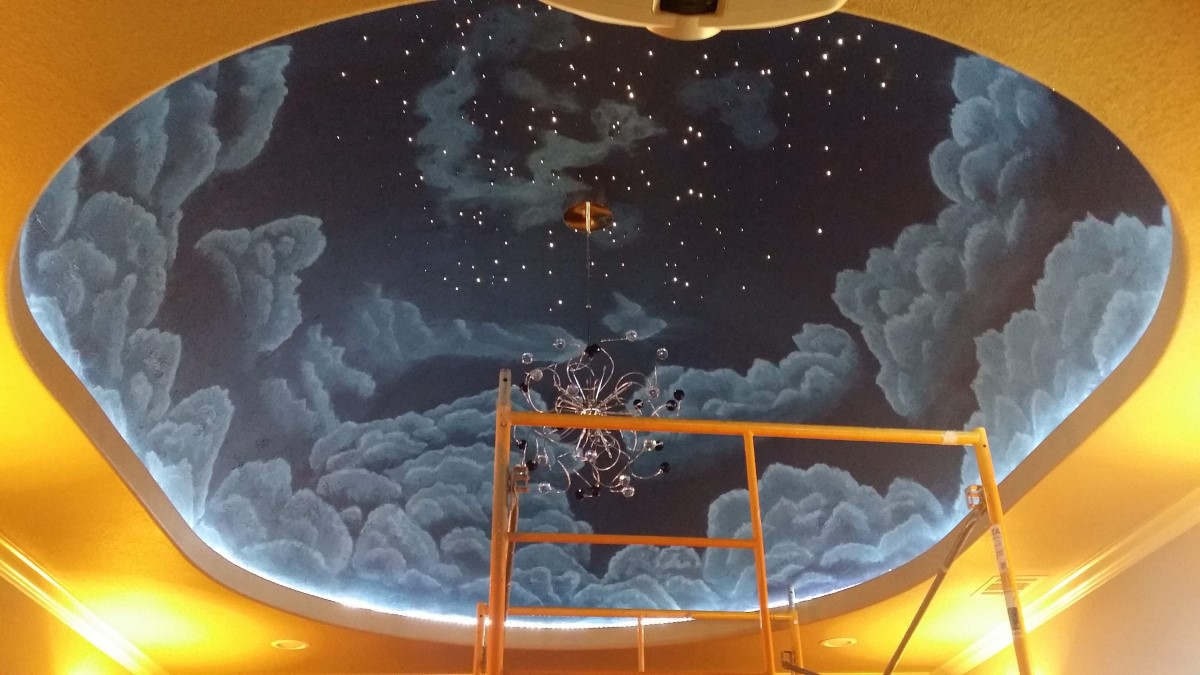
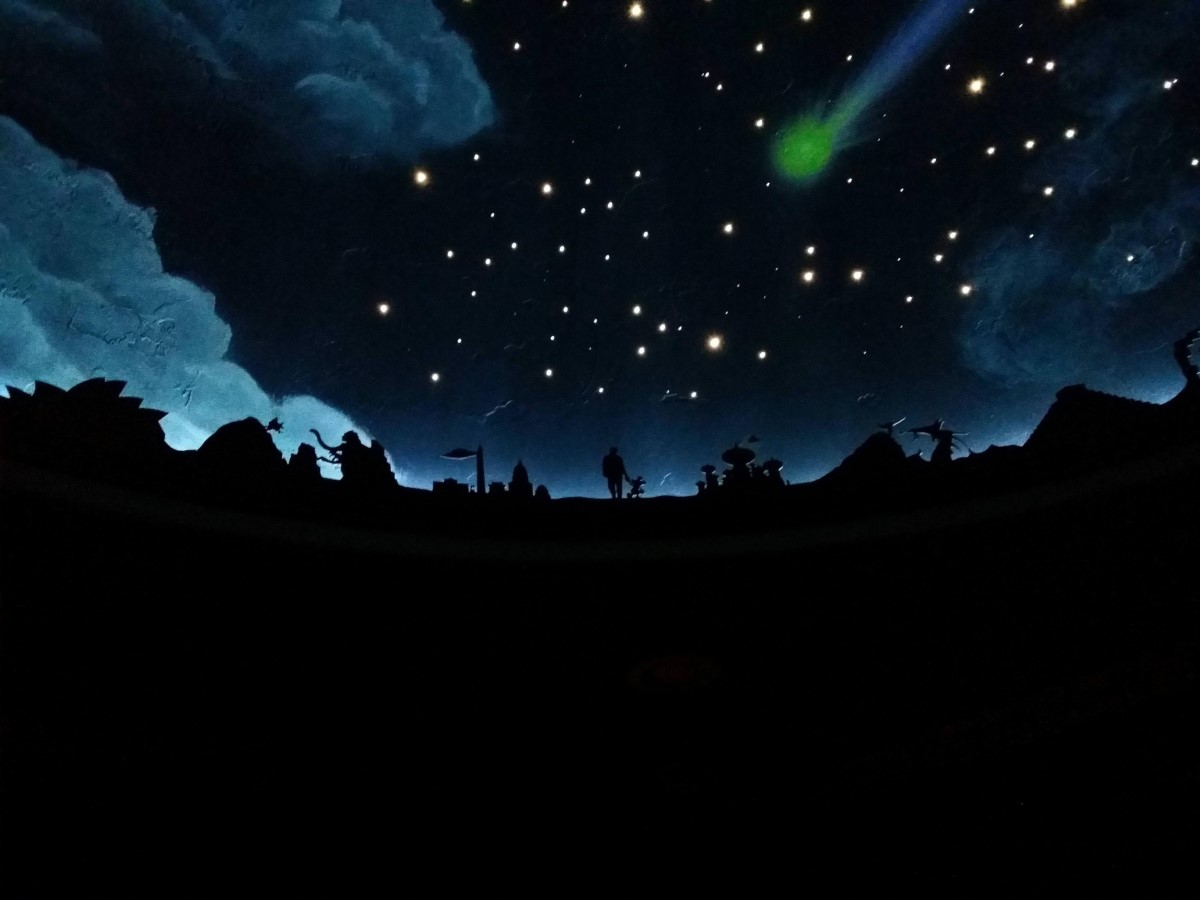
Airbushed in a huge comet.

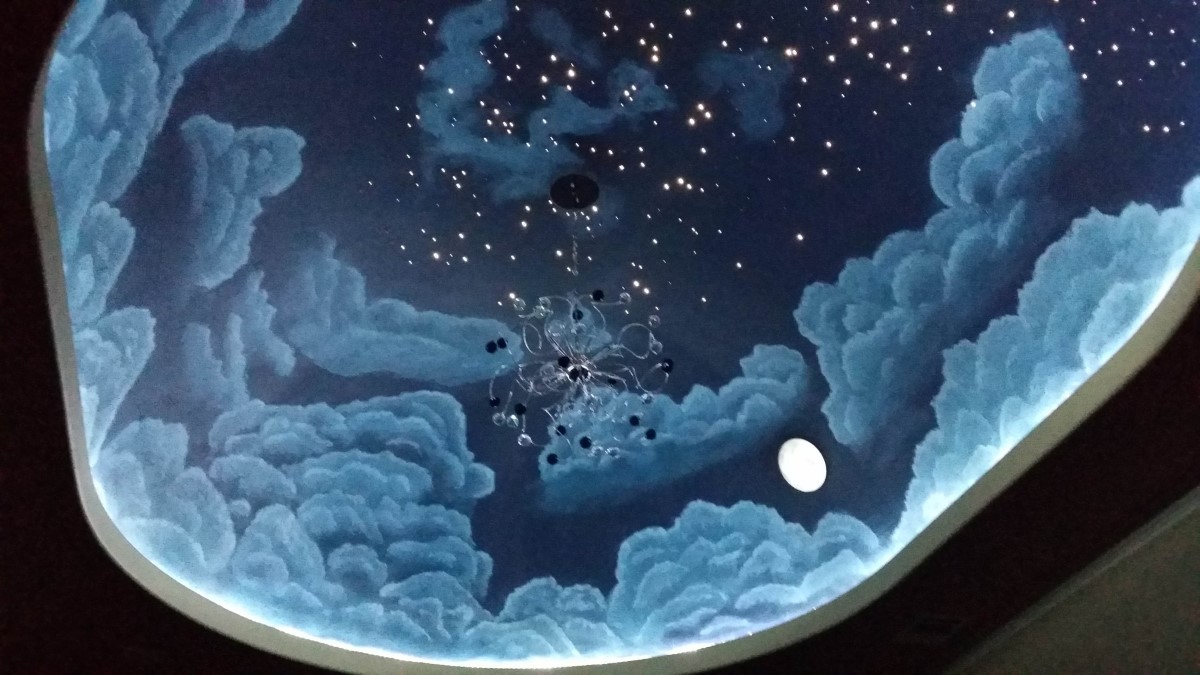
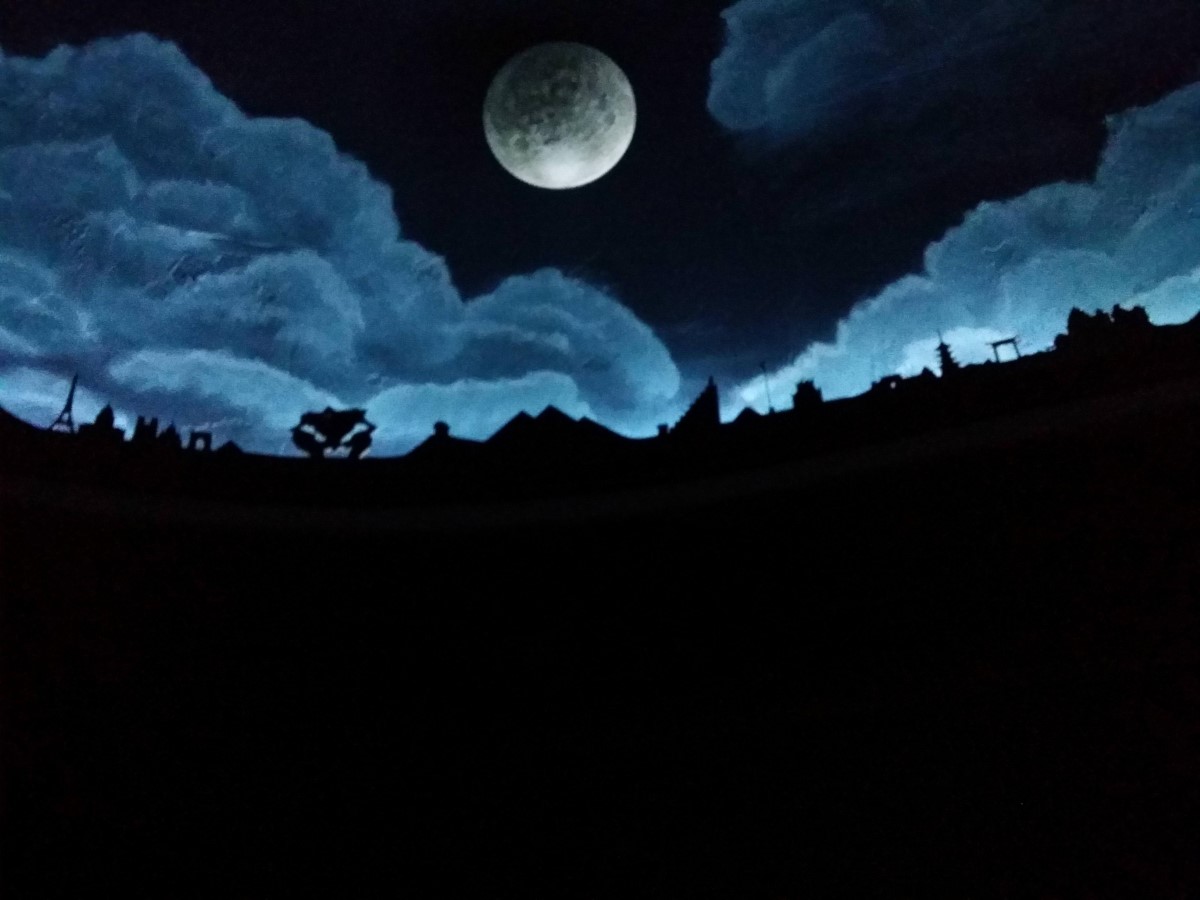
Added a kids light up moon the the dome. It turns on/off with a remote.
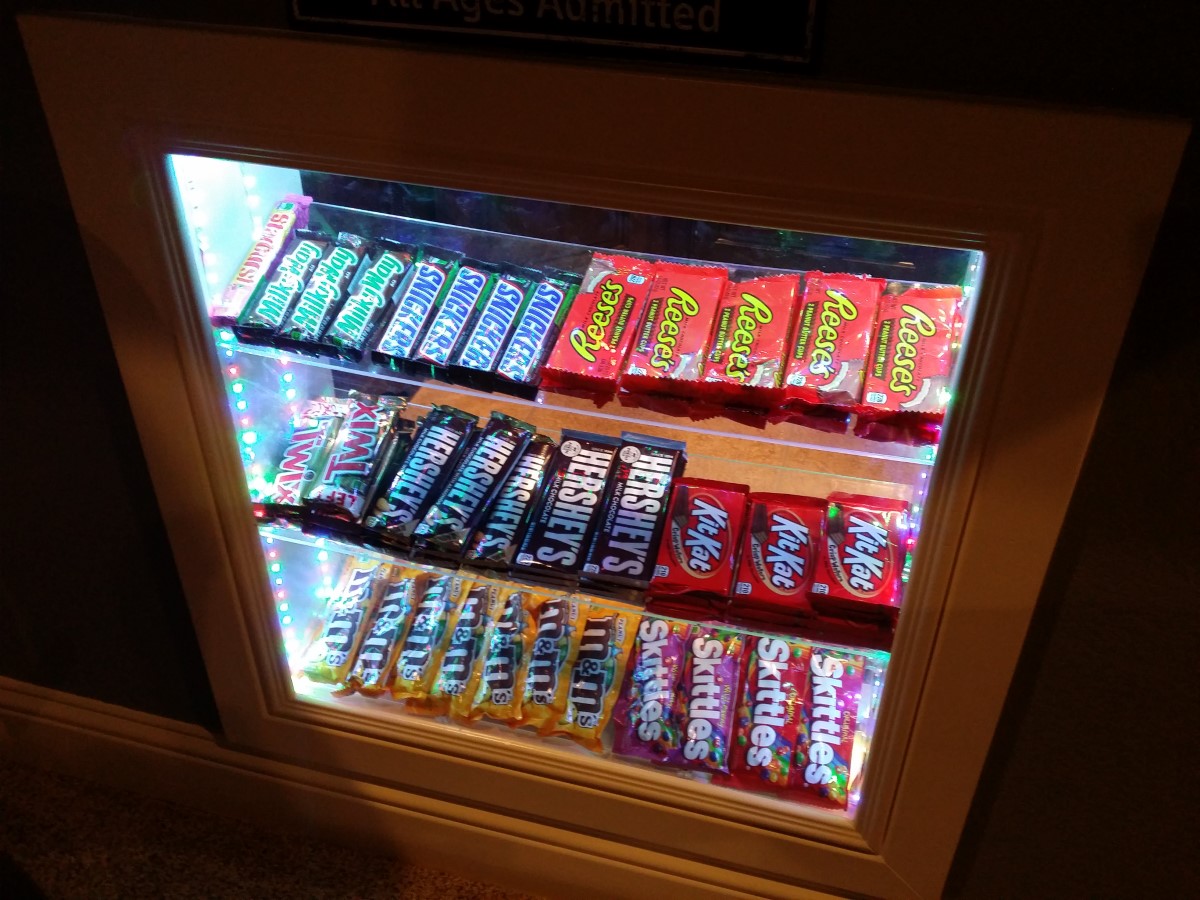
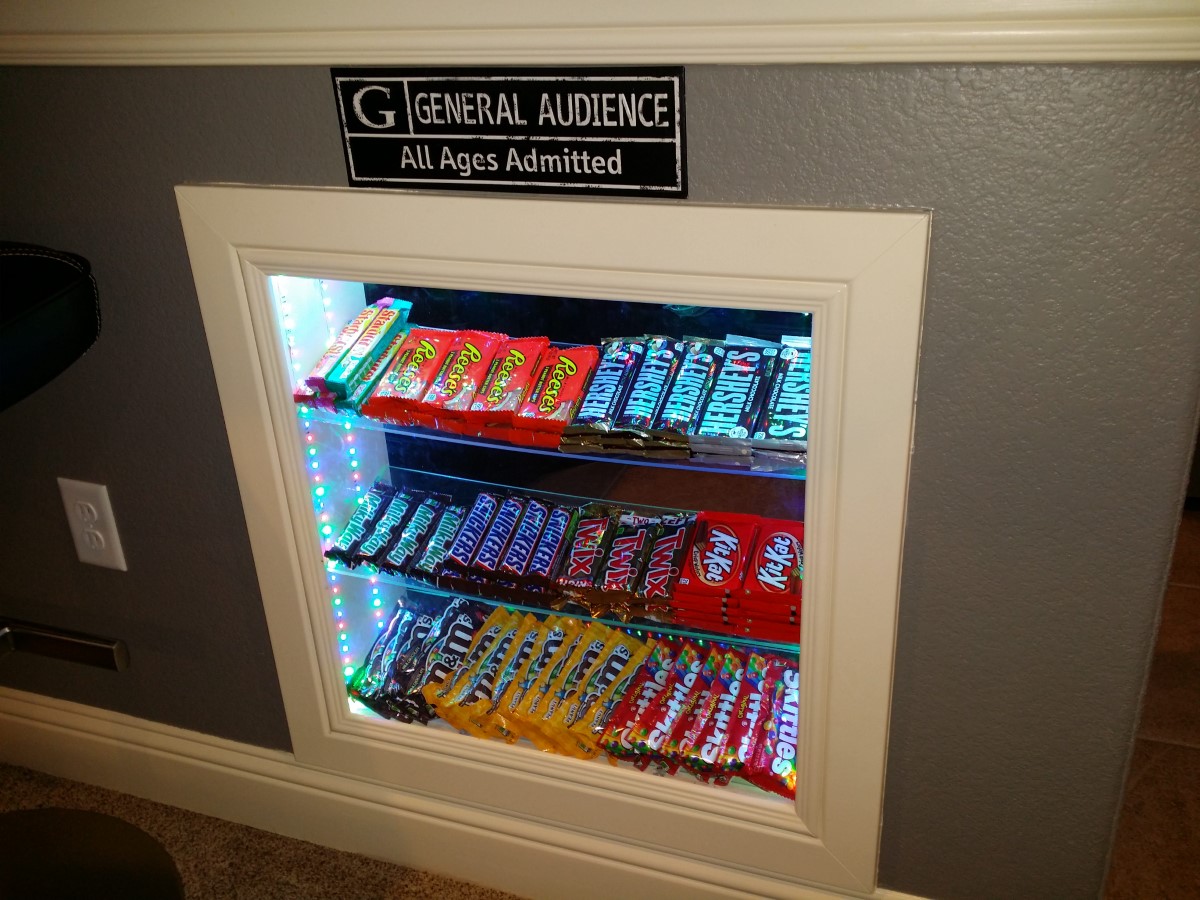
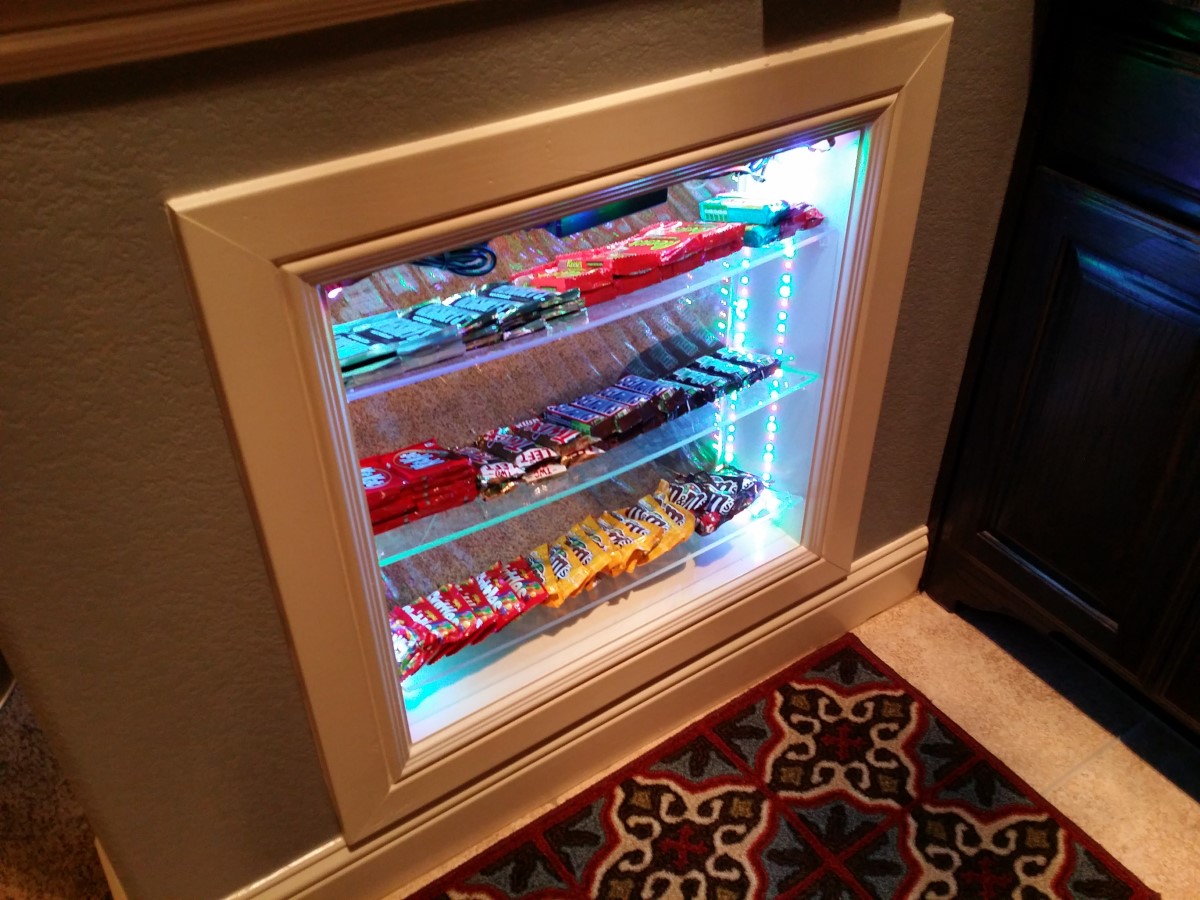
Plexiglass shelves and LED lighting added under the bar.
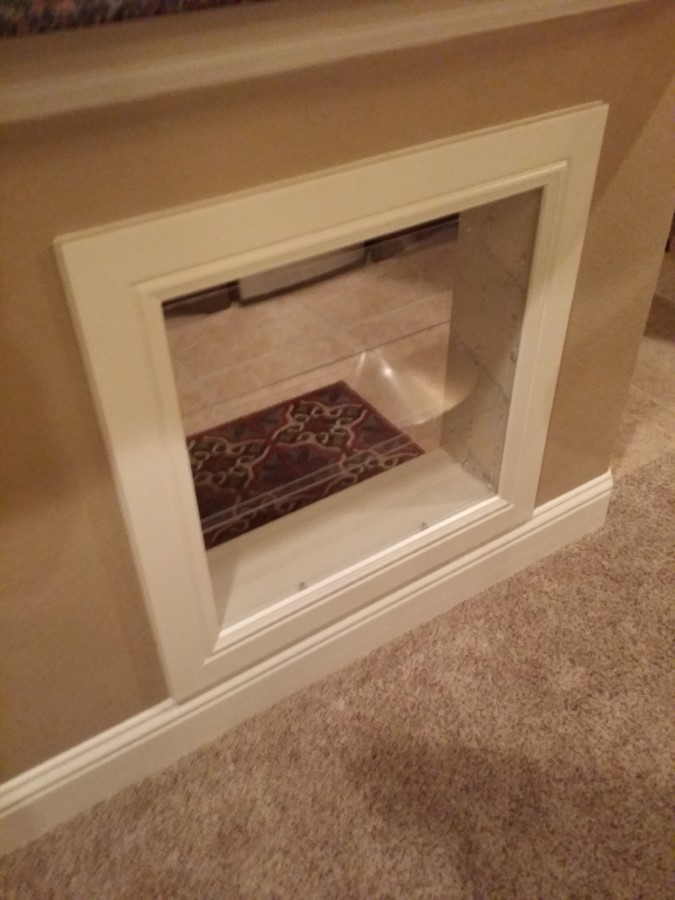

Candy is access from the bar side. Lights turn on from a switch on the wall.
I scoured internet for decent versions of movie posters and printed movie poster parts to adhesive vinyl and stuck these to foamcore panels. Then cut them out.

Stuck to foamcore
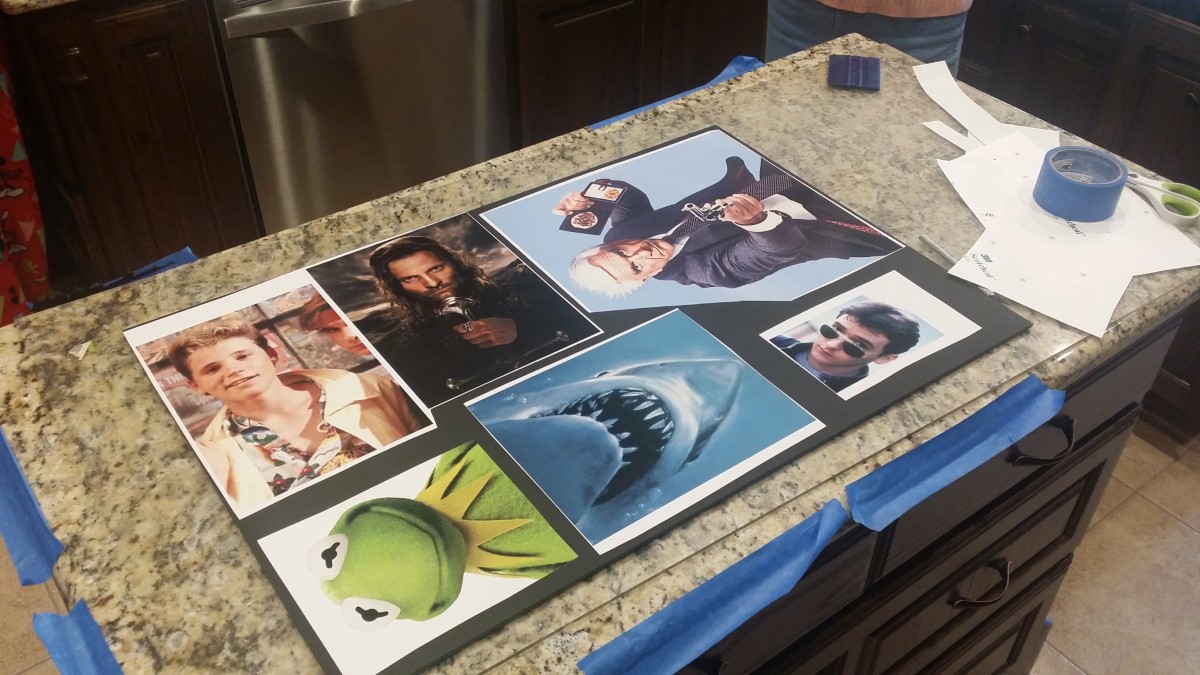
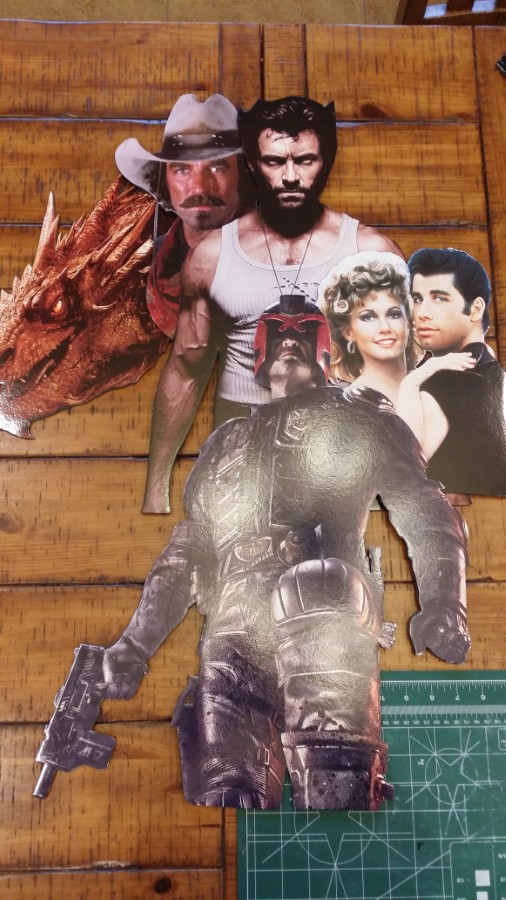
Cutting around the prints in foamcore. Then set together using 10lb double stick tape and spacers to give it a 3D look.
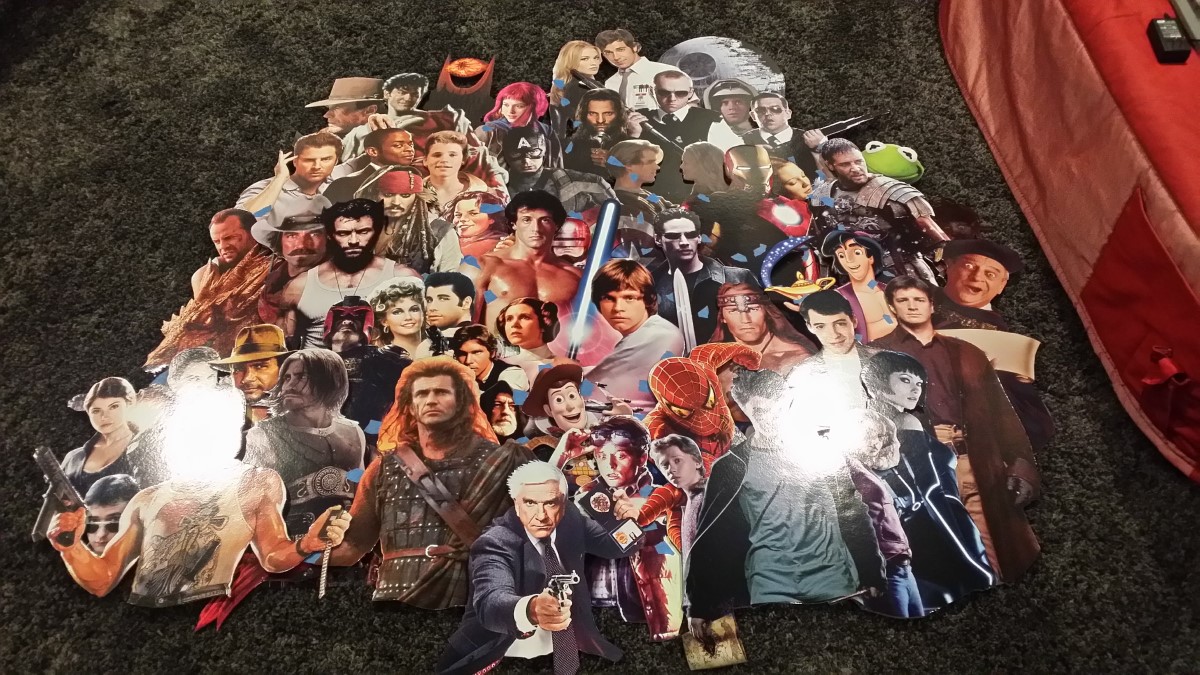
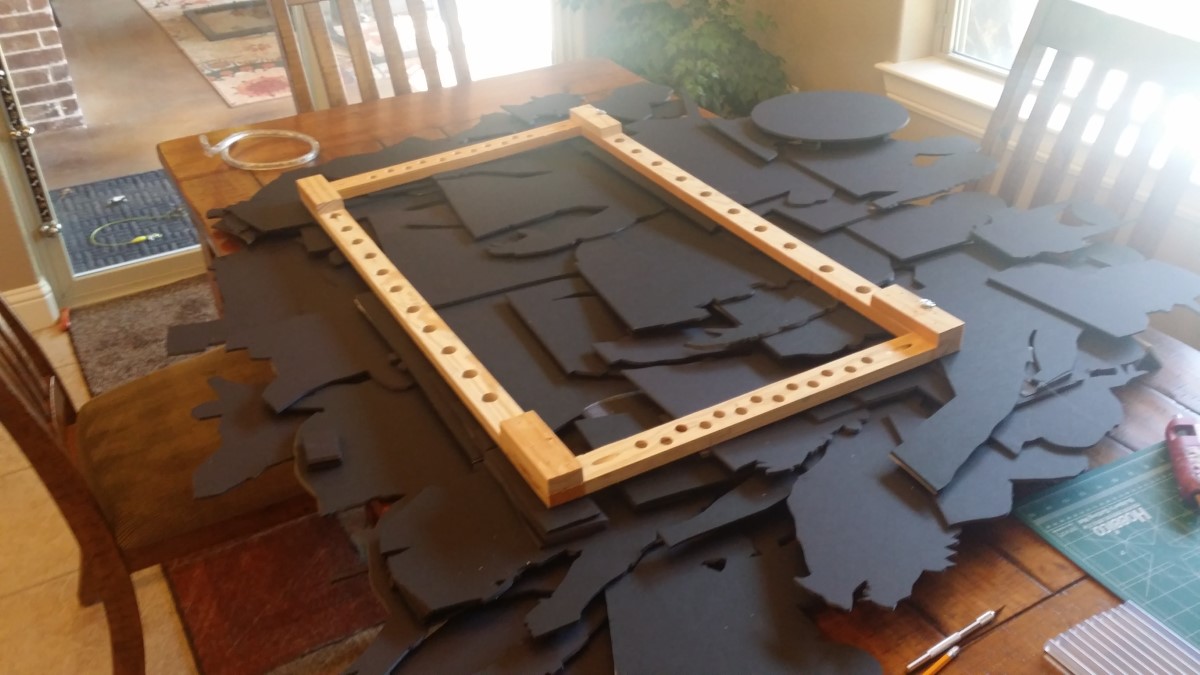
Initial layout before putting it all together.
All put together and attached to a frame. I also added rope lighting which I forgot to get a picture of.
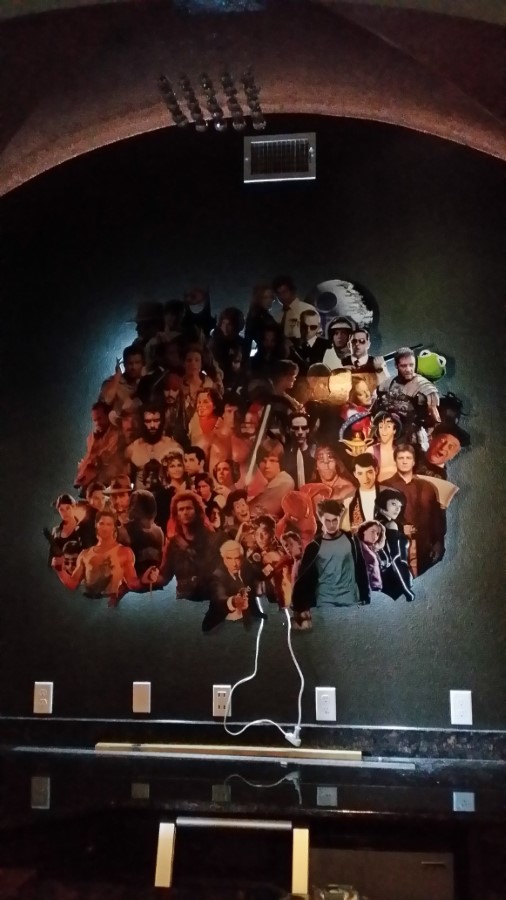
Testing the look and the back lights.
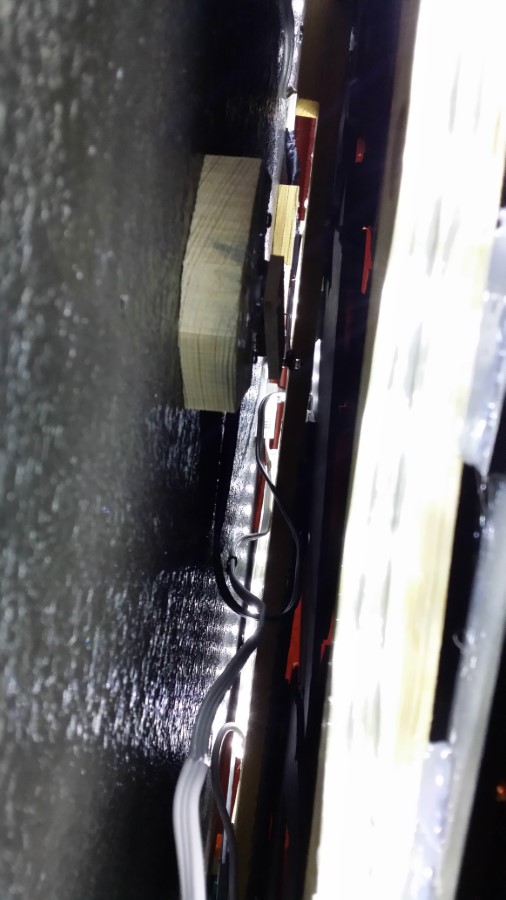
Prepping the moving parts and getting the motors installed behind the collage. Gives the sign a small bit of movement.
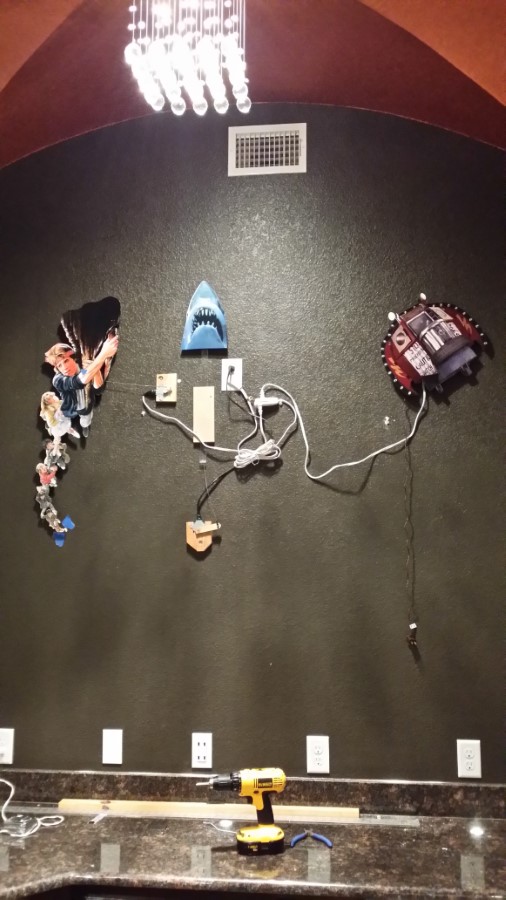
On the wall, motor clearances is ok and lights work.
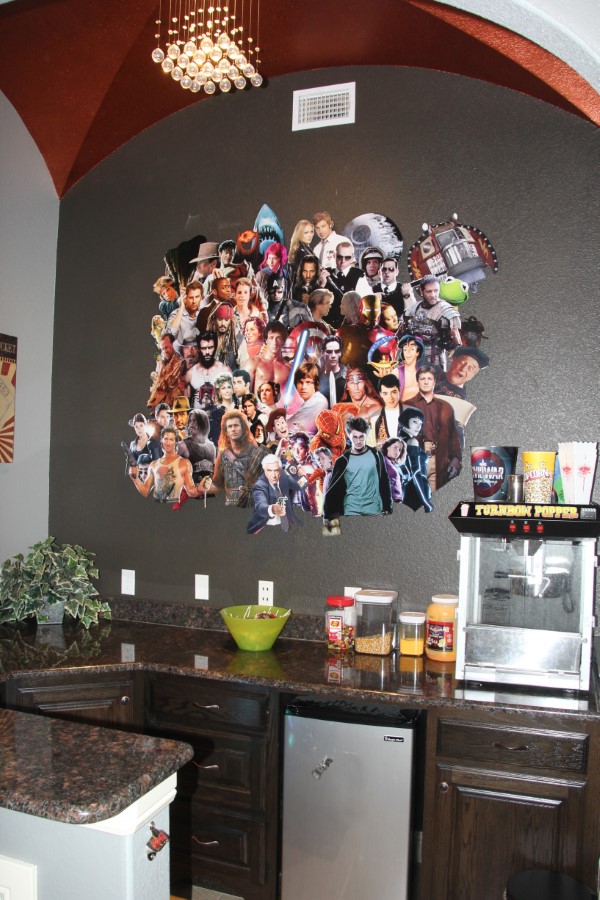
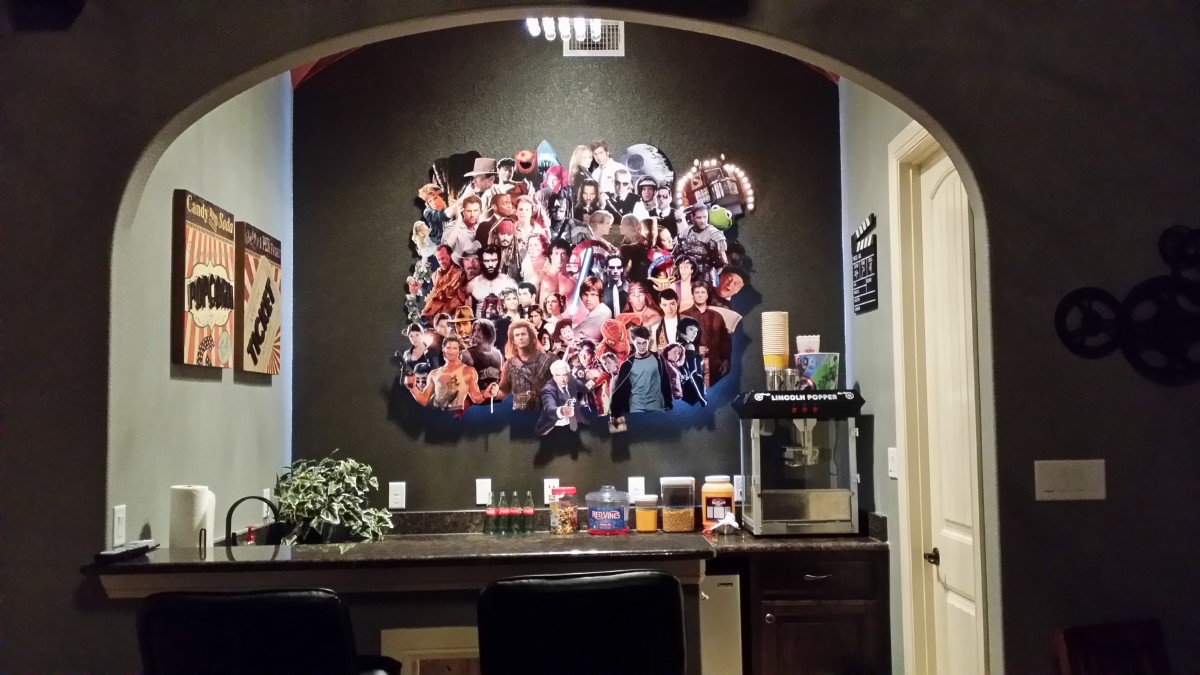
The full collage is together. Here is a Video of the collage in motion. Obviously we picked movies we like. I started with all blockbusters through history and changed to personal movies as I started cropping. No idea how Grease stayed in there. It should have been Grease 2 if it were personal favorites, oh well, nothing wrong with Olivia I suppose.
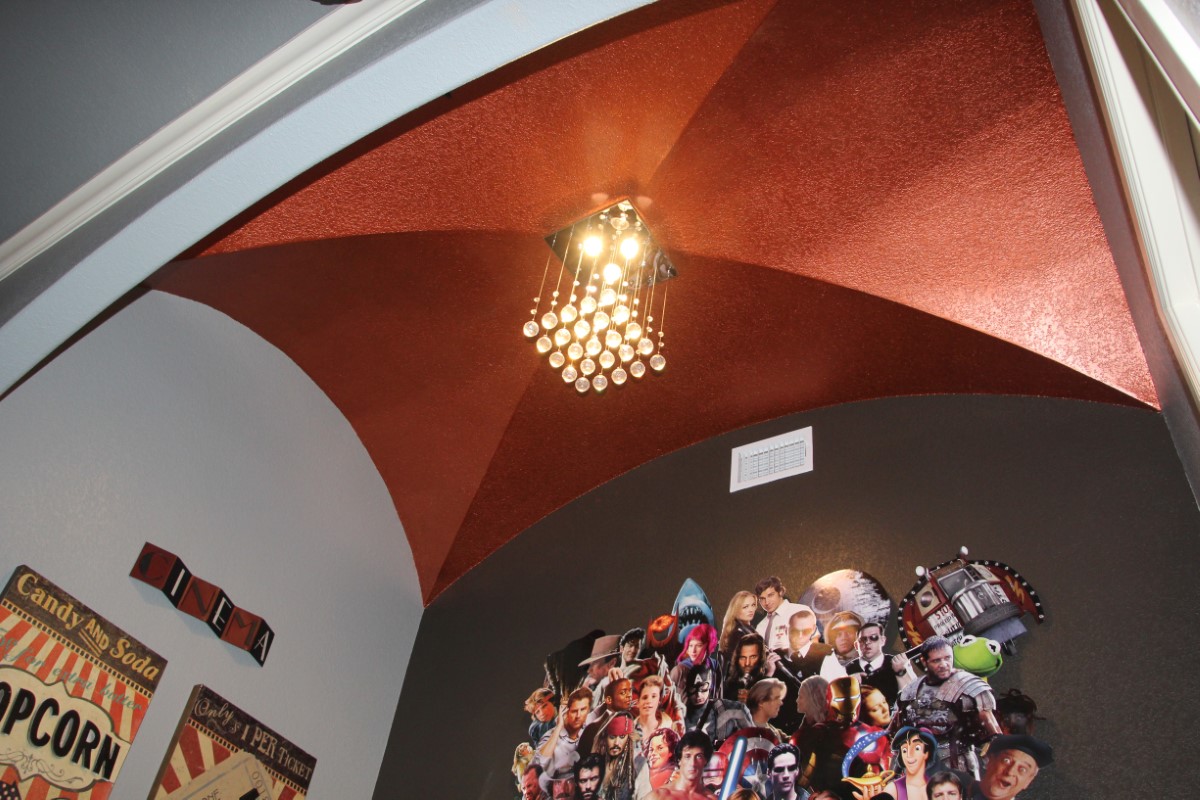
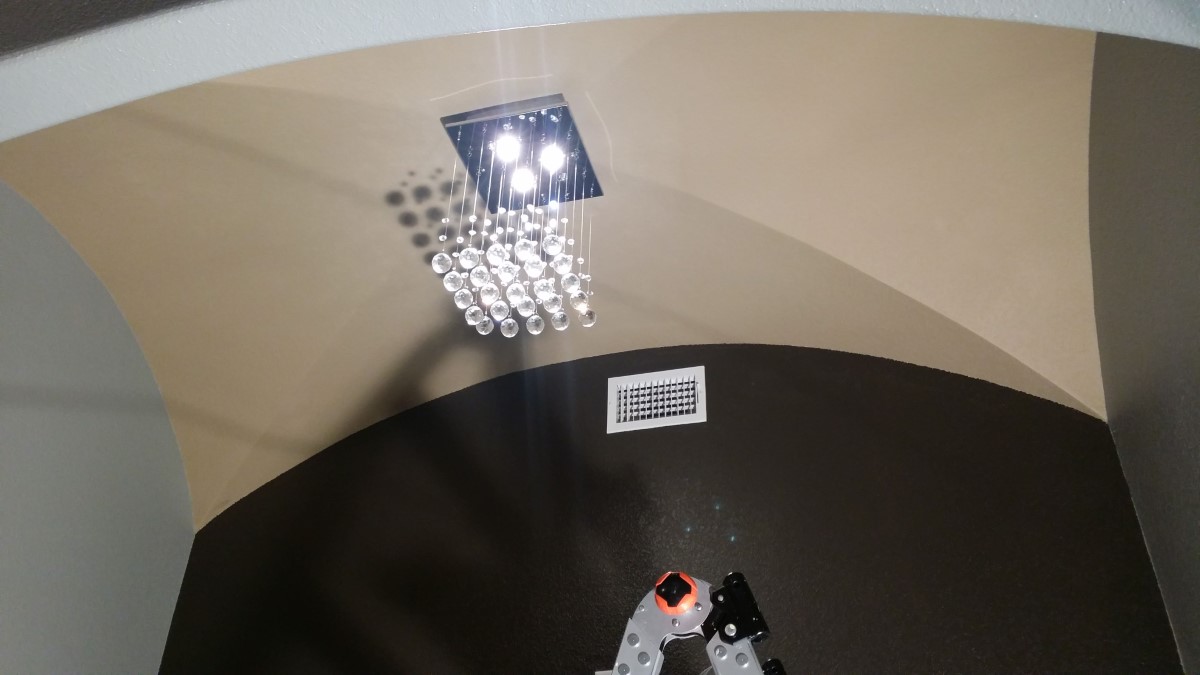
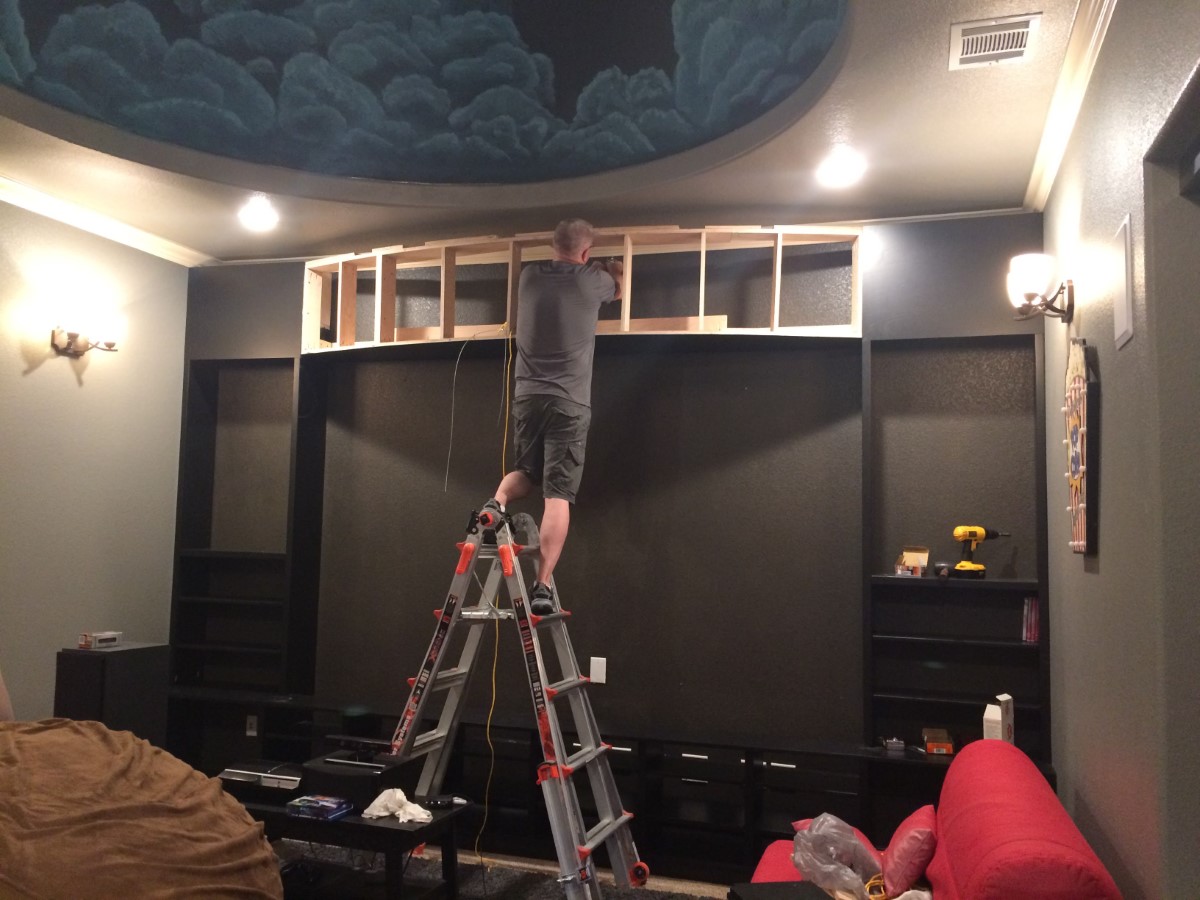
Love groin ceilings but this one is too boring.
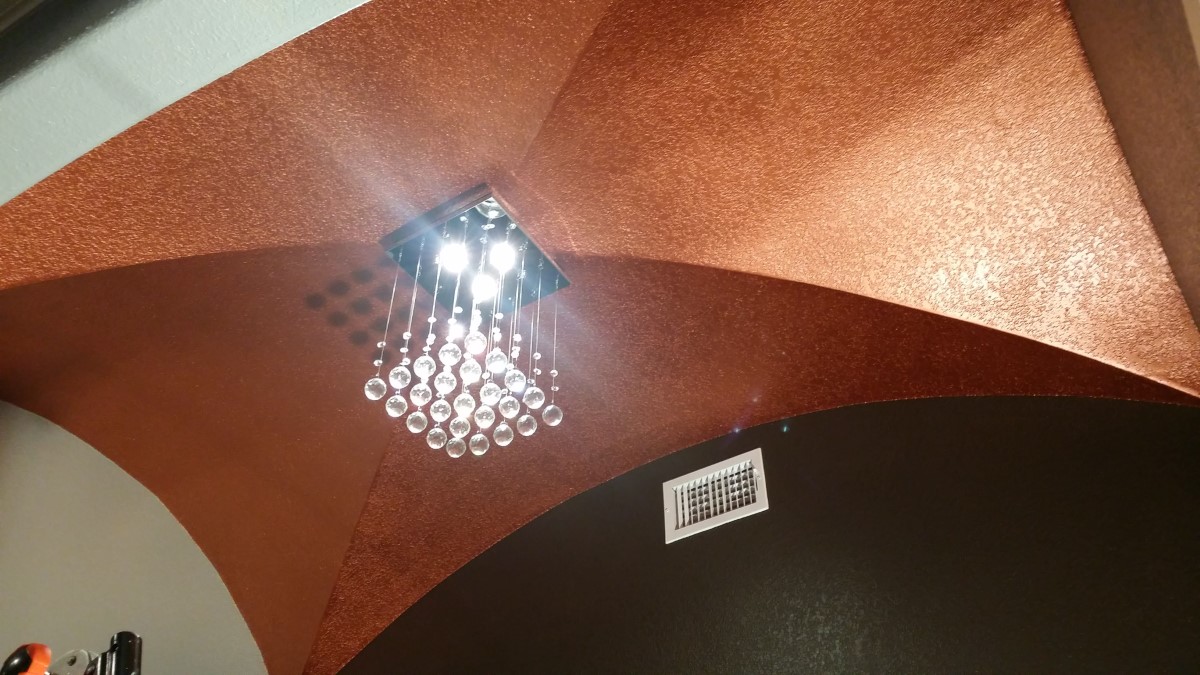
Much better with some metallic copper paint.
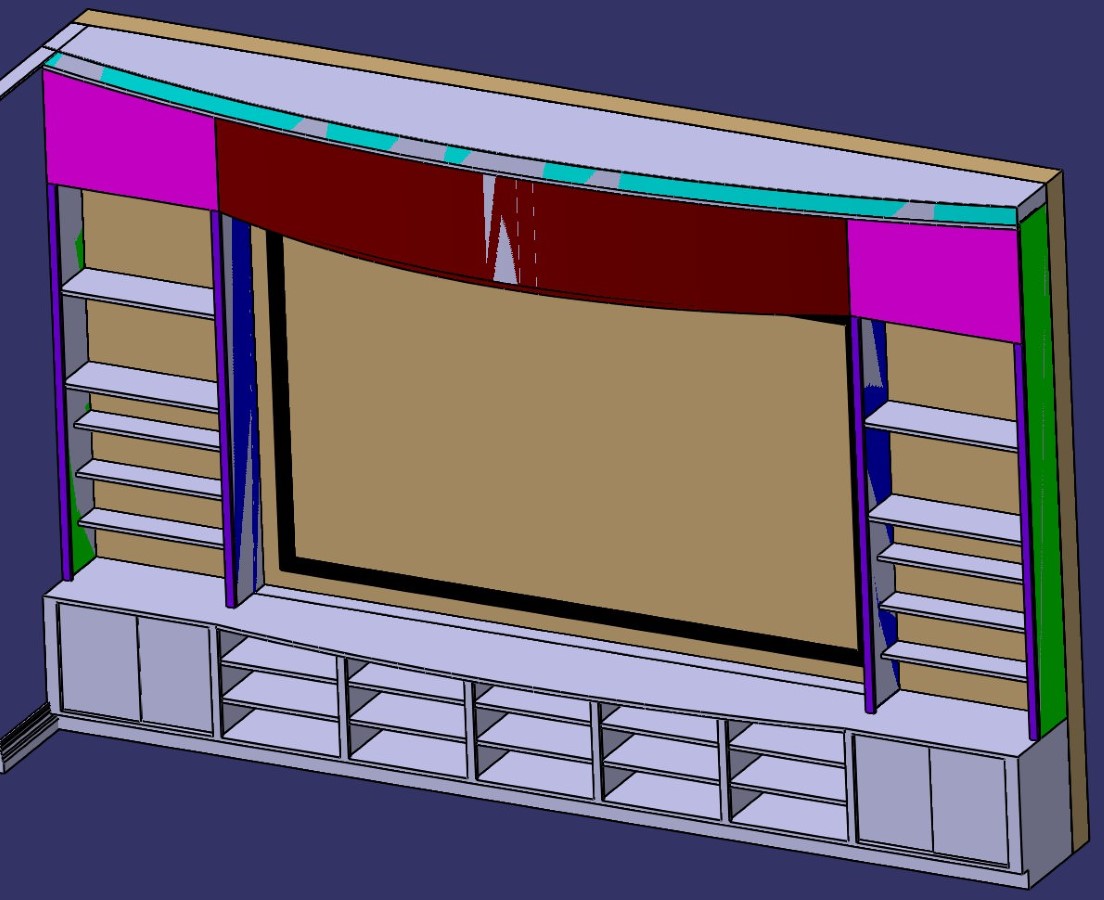
Cabinet plans drawn up. Went through many iterations of this design. Bowed out top and bottom. Shelves all the way to the ceiling. Fat shelves, skinny shelves. Fully adjustable, fixed, doors, no doors. Ended with a single fixed shelf on each side for stability, all others adjustable. The boxes on the side became doors with black speaker fabric. Each side contains a sub and extra controllers for game systems. A bulk of the games ended up in the closet adjacent to the bar. Most of the bluray movies still reside in the living room cabinet.
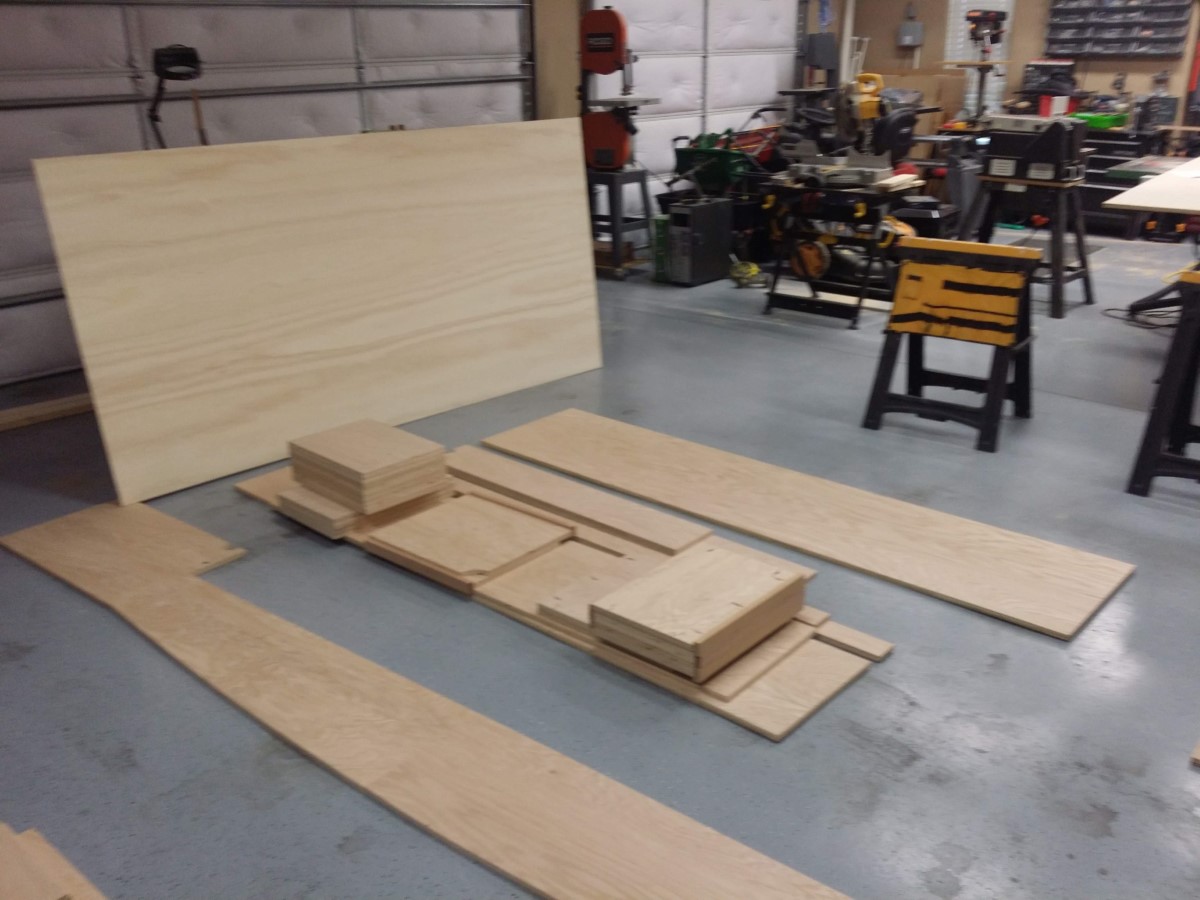
Time to work on the cabinets. Was going to use birch but the birch at the local store seemed pretty warped so we bought 3/4" oak plywood instead (then ruined it by painting).
Not great but capable paint booth.
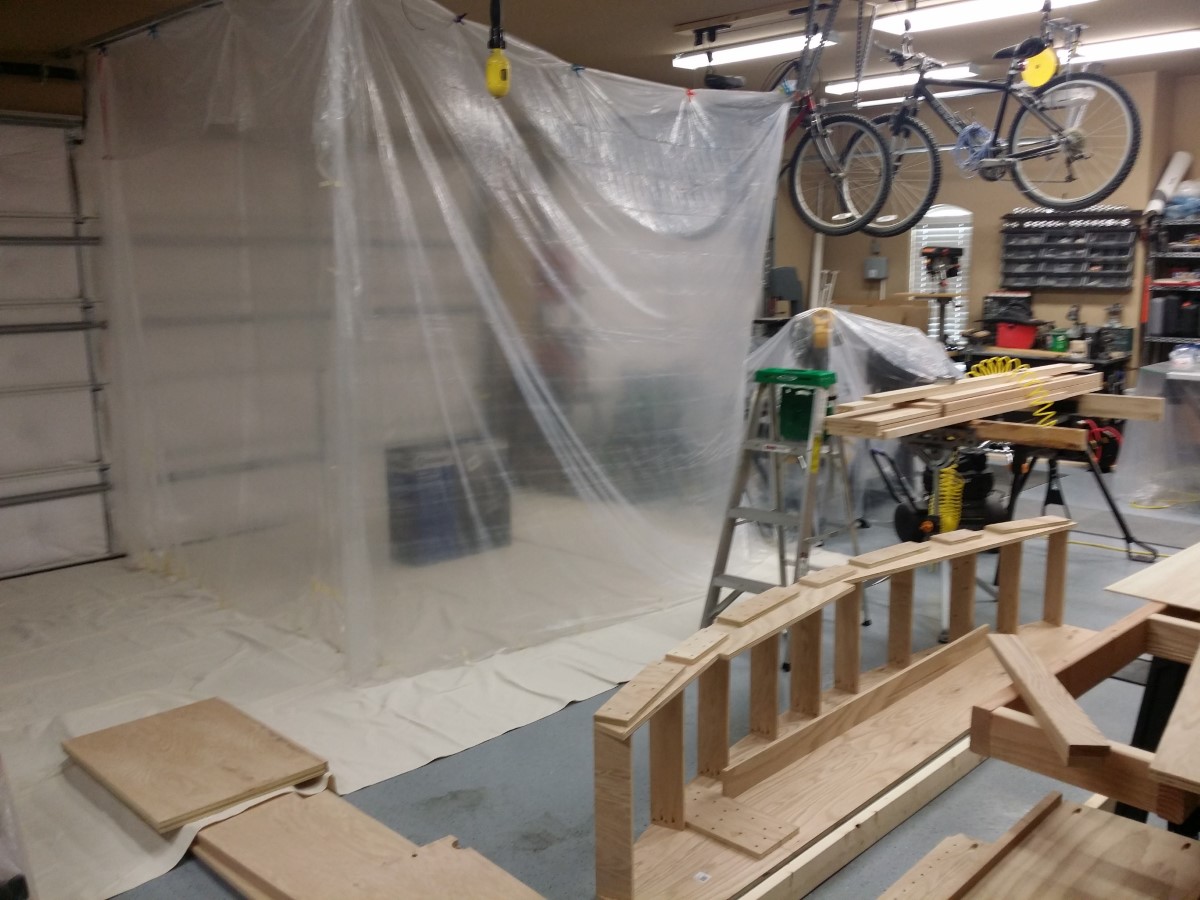
Testing the fit.
Paint sand paint sand paint sand. Ugh.

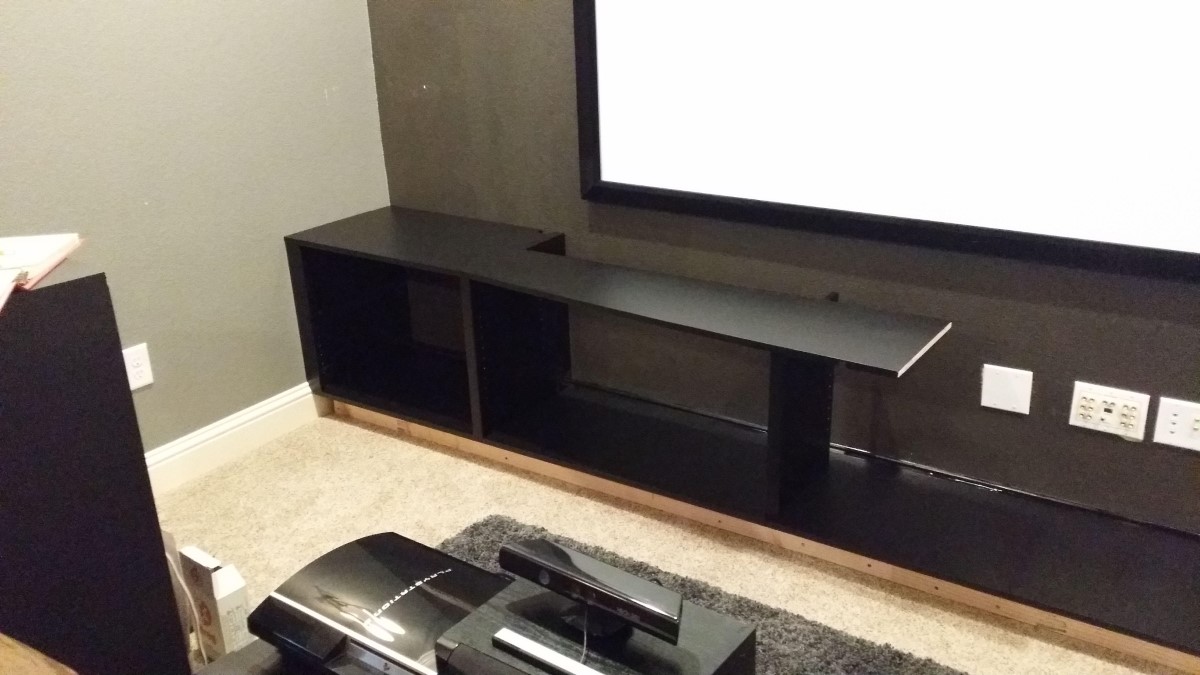
Finally coming together.
Added some cabling from the wall to the protruding cabinet as I didn't want to try to connect to the ceiling. I was worried about sag in the center.
Cleaning up some gaps and done.
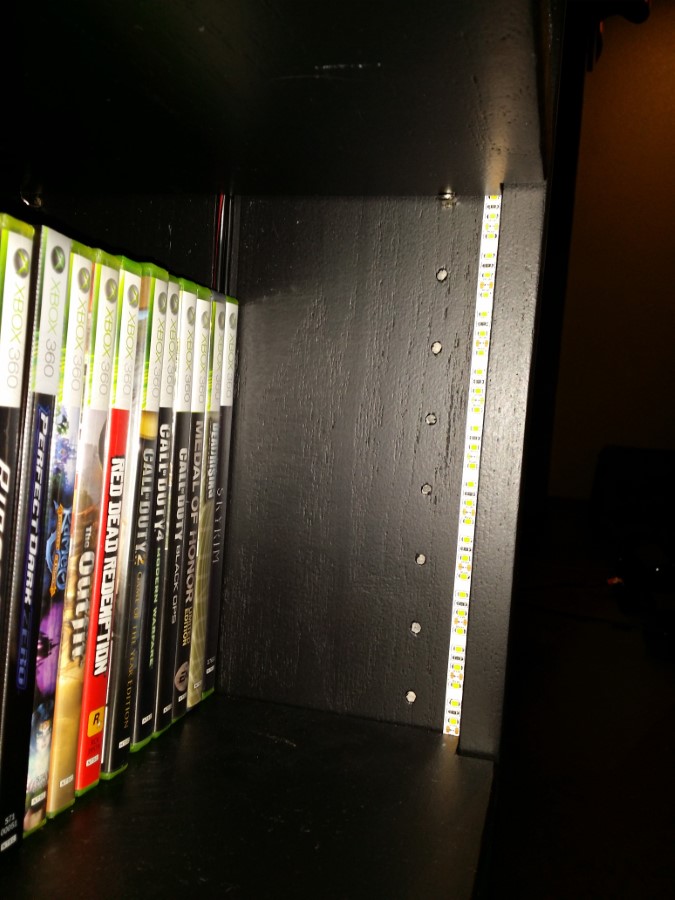
600 16ft LED strip added around the perimeter of the cabinets/shelves. These turned out to be too bright so I added the optional dimmer to them and now they are perfect, plus the added bonus to brighten them if needed.
I blocked the small bit of extra wash light with some plastic extrusion. Kept the lights from shining on the walls.

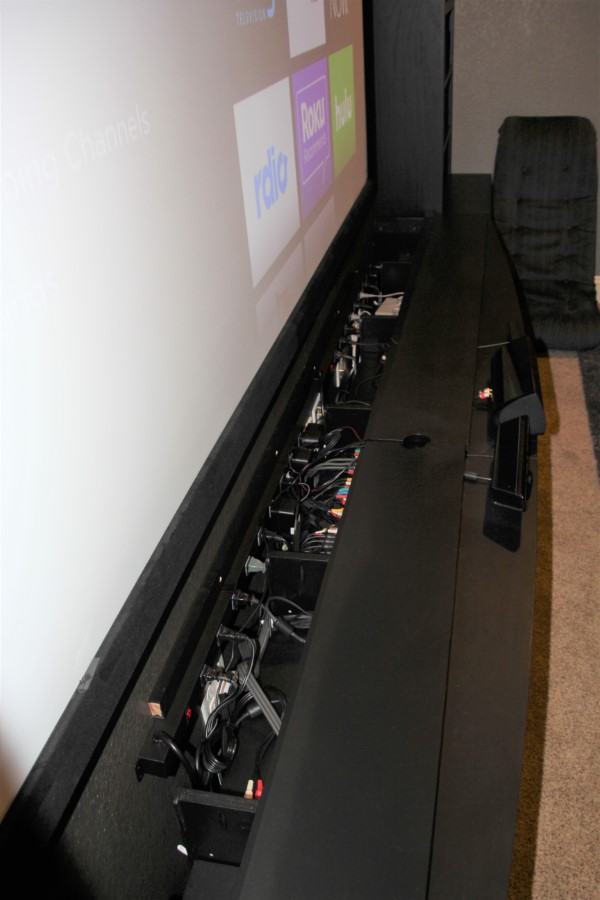
Panels can be removed from the top back to get access to the wiring. I have two power strips attached to the wall at the top to make it easier to plug everything in.
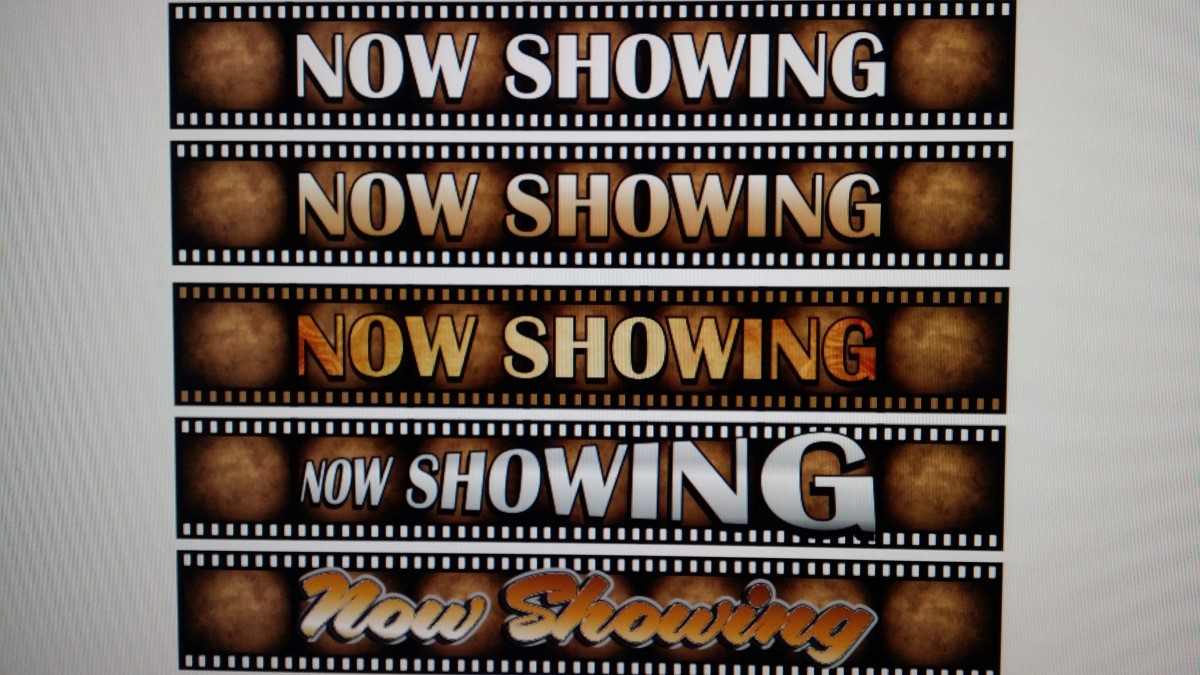
Trying different designs of for a sign over the screen. This was over a year before I actually started the cabinet and guessed the size wrong. The sign ended up much larger (barely fits the cabinet) than it was supposed to be but I wasn't going to print another since I already had it.
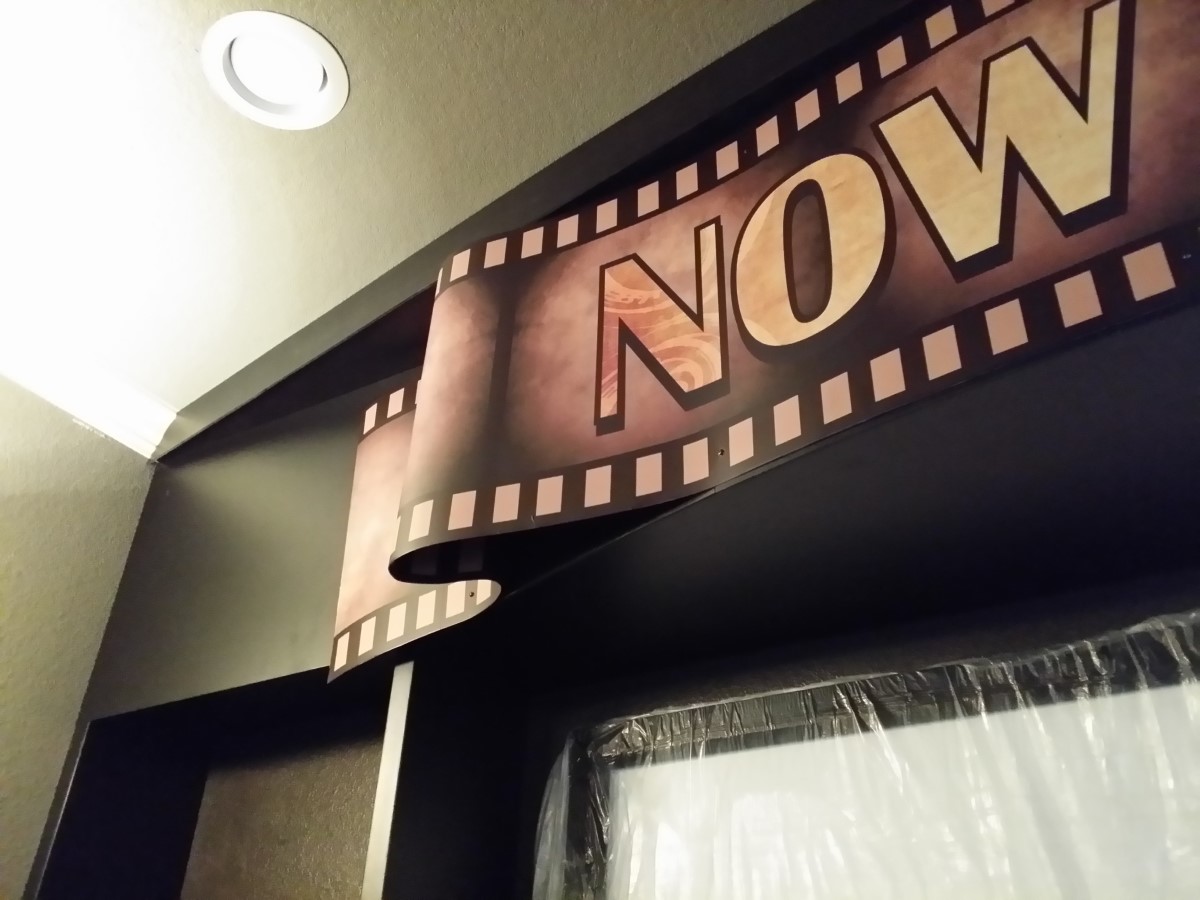
Absolutely missed taking a pictures of this part. The sign was printed on adhesive vinyl. I found just the right width flashing sheet metal and we attached it to that (without getting sliced up in process). The sheet metal was then bent to match the curve and ends.
Attached the sheet metal sign with small screws and touched up with some black marker..
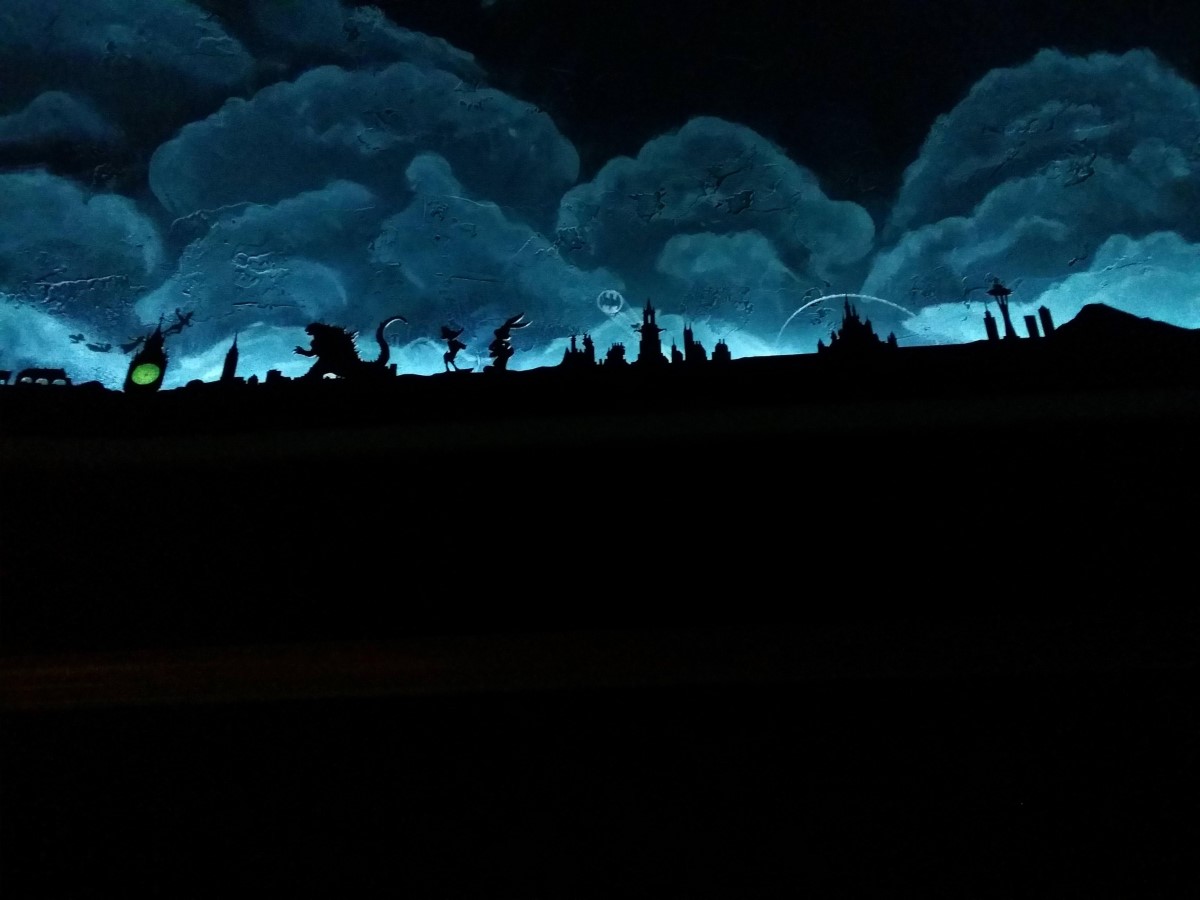
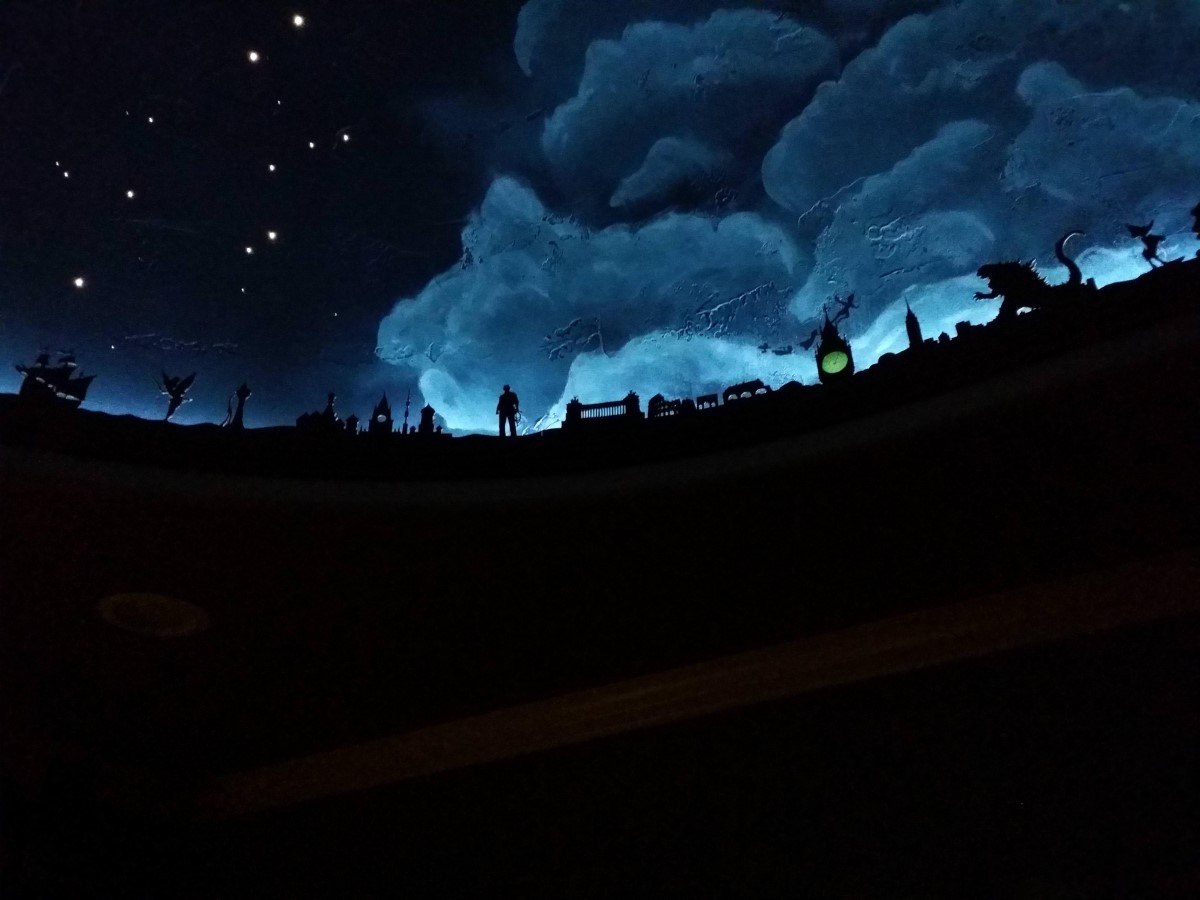
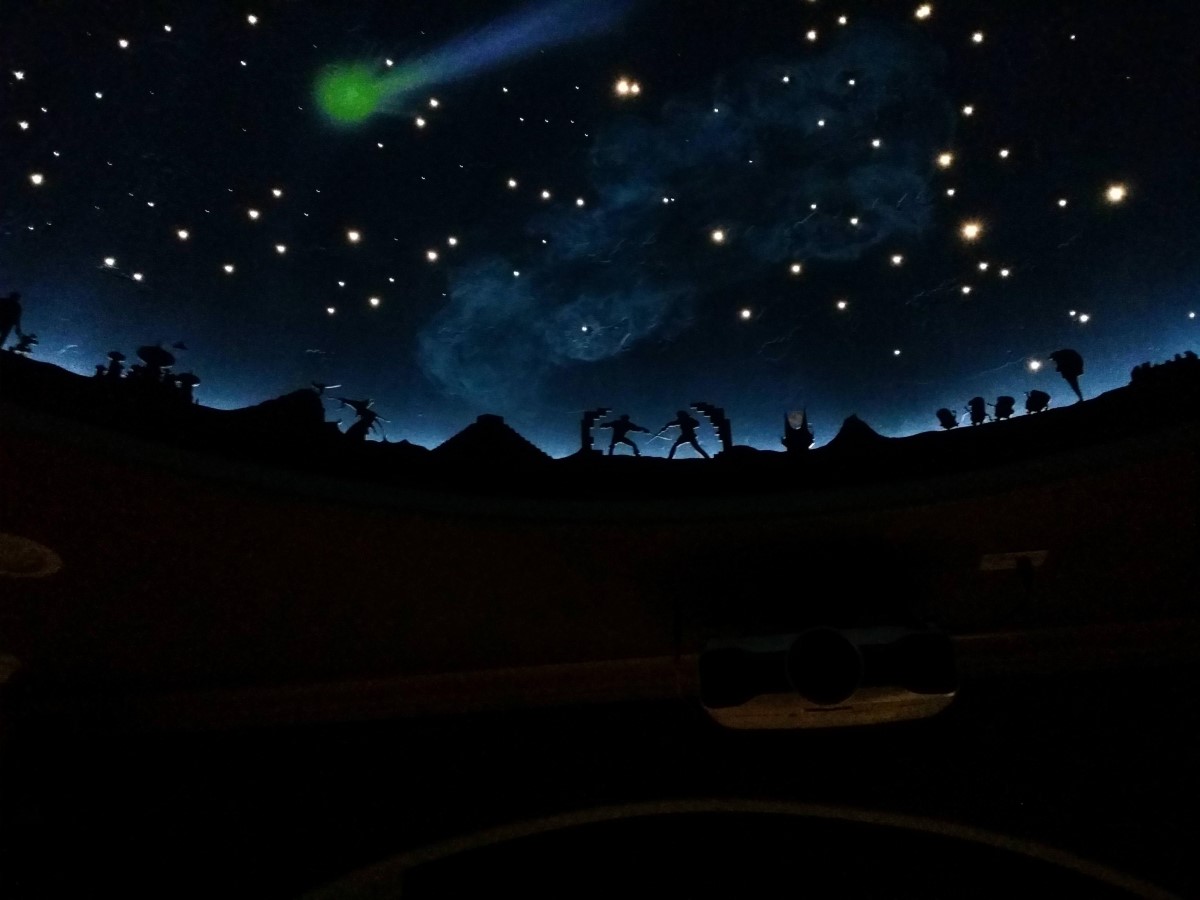
I didn't like that I could see the rope light when I stood in the bar area so I decided that silhouettes to block the rope. I completely blew it on pics of this step even though we spent a solid 3 weeks cutting the 2mm black Sintra by hand with Xacto knives. I added black trim around the dome and cut a 1/8"x1" out of the back of it to slide the Sintra in. I scaled and printed about 100 things that I thought would be neat around the circumference of the dome to block the light. We placed the images on the Sintra and ran over it with the Xacto knife to score the material then removed the paper and hand cut them out. We both felt like we'd damaged out joints after a few weeks of cutting. Sintra is soft enough and all but 2mm by hand with so many small details took so many cuts and passes..... Looks awesome though so who cares. For the few things floating, those I printed on transparencies, cut them out then pasted to the backside of the Sintra. I painted the bat signal on the dome (there is a tiny Batman on the building). The Sintra pieces range from 6" to 24" long for each section. I blocked any small sliver of light between them with electrical tape.
Right to Left: Seattle, Disney Castle, Gotham, Bugs and Daffy, Godzilla, Peter Pan
Right to Left: Godzilla, Peter Pan, Rome, Indy, Moscow, Tangled Tower, Tinker Bell, Pirates of the Caribbean
Right to Left: Indy, Moscow, Tangled Tower, Tinker Bell, Pirates of the Caribbean, Halo, Despicable Me

Right to Left: Despicable Me, Lord of the Rings, Princess Bride, Mexico, Sleeping Beauty, Aladdin
Aladdin and Jasmine are flying over on the carpet
Right to Left: Mexico, Sleeping Beauty, Aladdin, Walt Disney and Mickey, Washington DC, Clash of the Titans (classic version with tiny Perseus and Pegasus)
Right to Left: Sydney, Little Mermaid, Rio de Janeiro, Star Wars, Kyoto
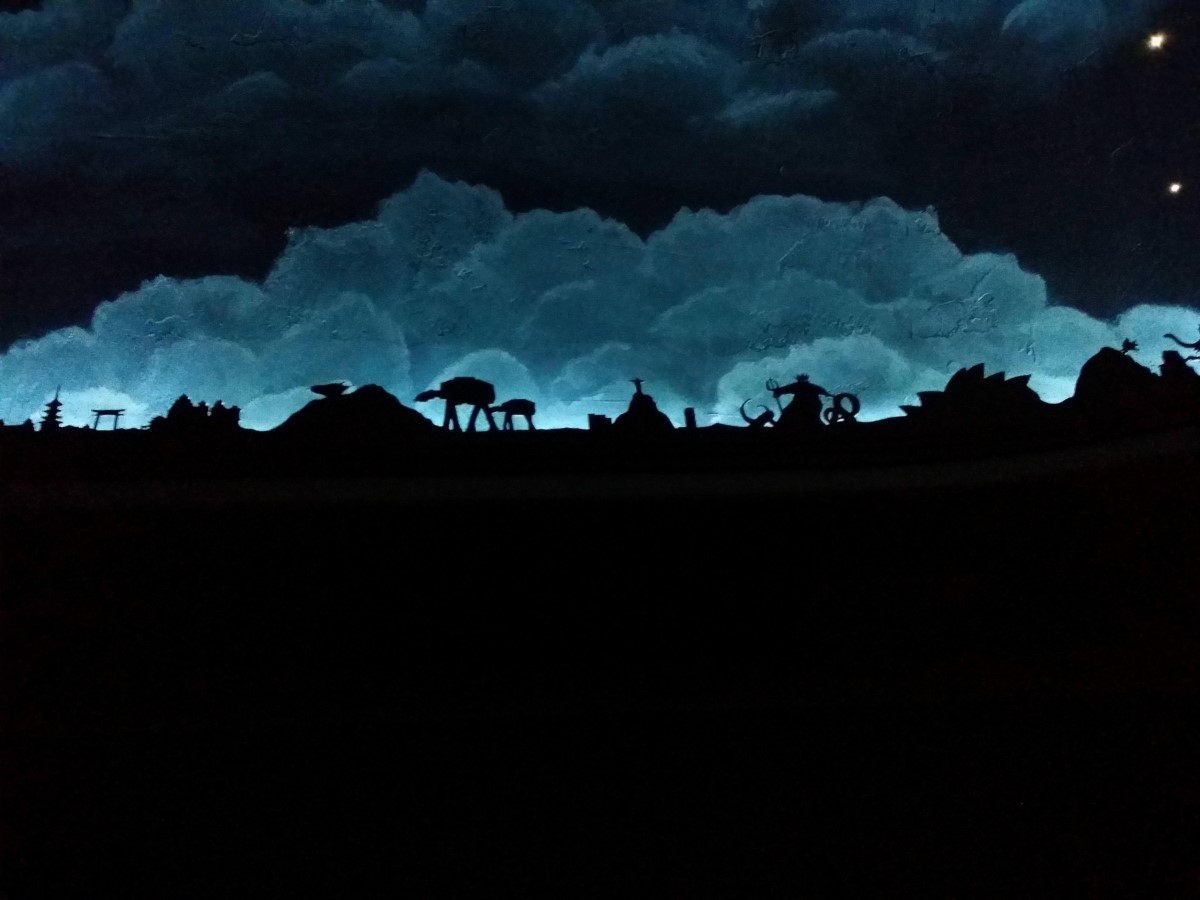
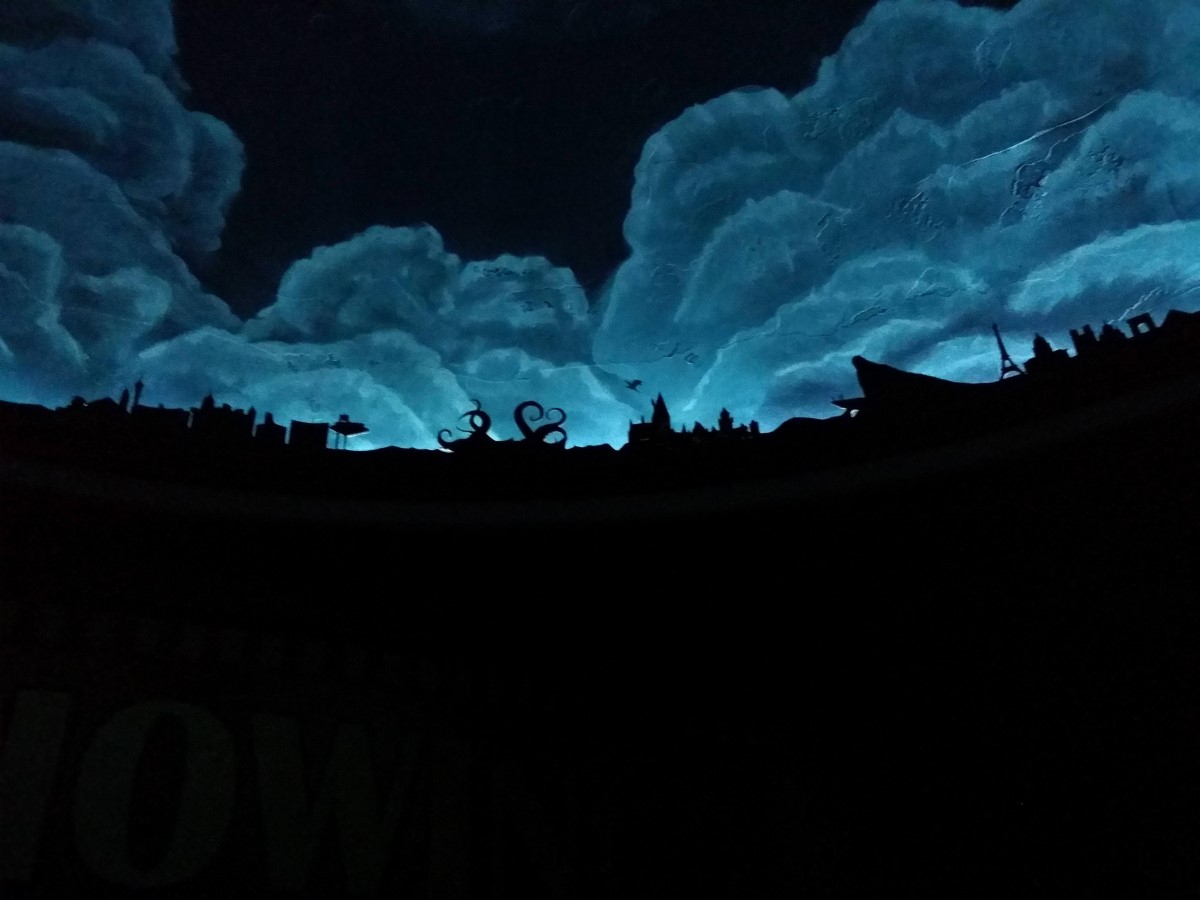
Right to Left: Kyoto, Super Mario Bros, Egypt, Iron Giant, Paris
Right to left: Paris, Lion King, Hogwarts, 20,000 Leagues Under the Sea, Las Vegas
Hogwarts has a dragon flying overhead and holes to show lights in the castle but they don't come out in the photo.
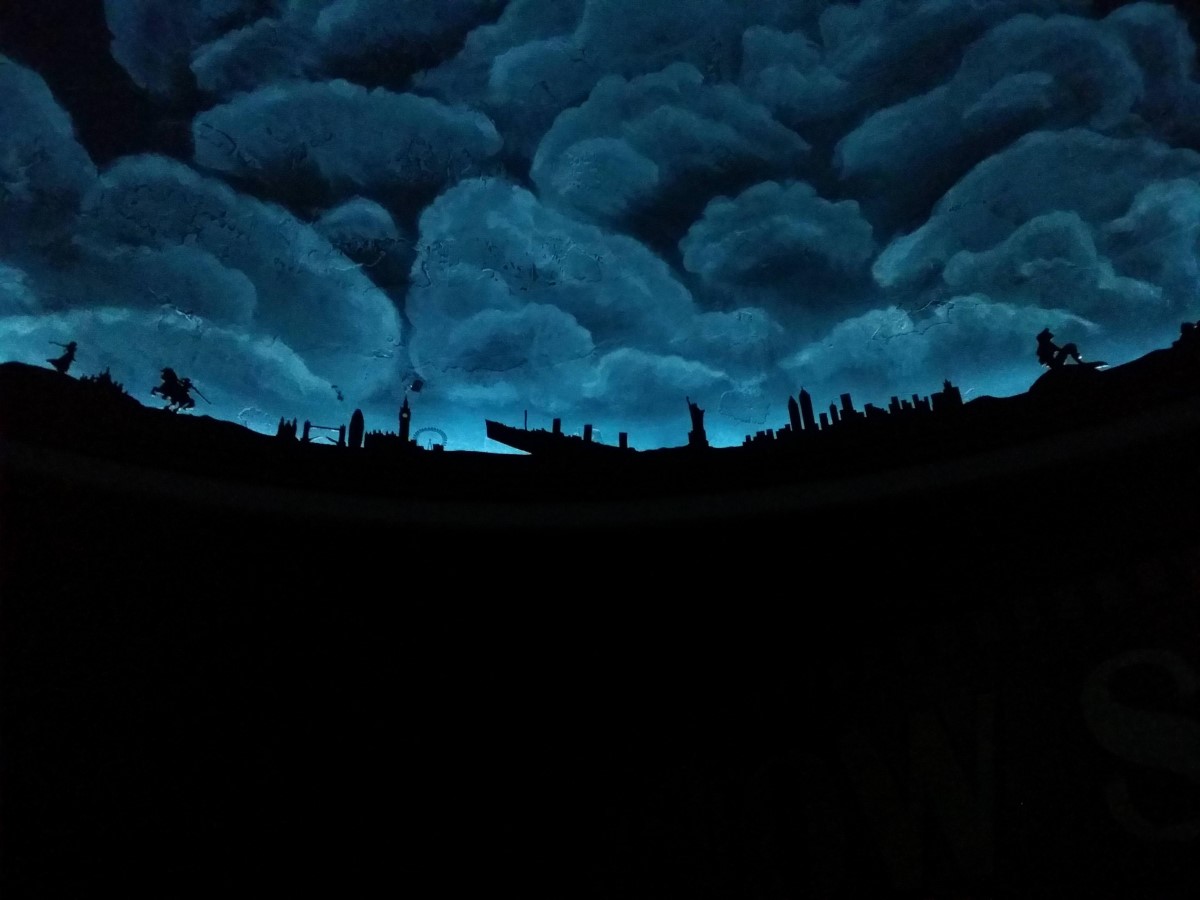
Right to Left: Little Mermaid, New York, Titanic, London, Legend of Zelda
London has Mary Poppins and the Tardis flying over it.
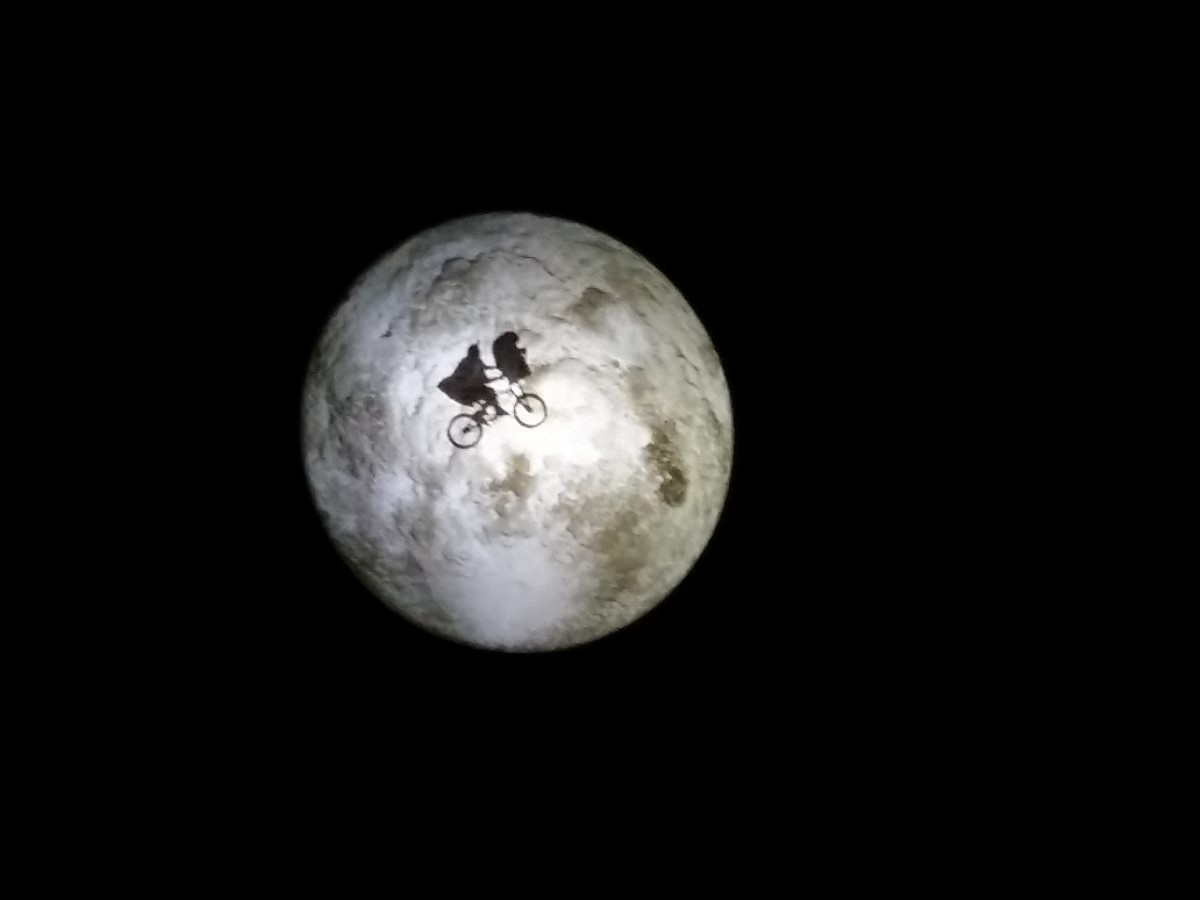
Added ET to the moon.
I may have misjudged how much stuff I have. I filled all of the shelves and had to return some of the old systems back to the dark dark closet.
3DO, Xbox, Saturn, Xbox One, Dreamcast, Xbox 360, WDTv and Roku
Playstation 2, WiiU, Retron 5, Playstation 3, Gamcube, Jaguar, Playstation, Nintendo 64 and Super Nintendo
This the the floorplan of the house for the theater room.
During construction we ran fiber optics to the dome from the bar ceiling. They light engine turns on from a switch on the wall.
More fiber shown running to the dome. We made a mistake in the plan however, once the sheetrock was installed, we couldn't reach one side and front of the dome due to the roof line. So we decided to only run down the back and center so it keeps the stars out of the eye line when watching movies. We were able to fill in the missing area with clouds (below). It almost looks intentional :/
This is the fiber hanging through the holes on the udnerside before cutting and paint of the dome.
This is what we started with after temporarily putting up the screen.
Starting picture of the bar area.
Room is repainted to dark brown and gray.
Dome is painted dark blue and rope light added around the perimeter. The rope light turns on from a switch on the wall. Unfortunately, you can see the rope light from the back of the theater in the bar. We fix this issue later by adding the silhouettes.
Cloud painting time! As it turns out, 15' is a long way up to reach on a ladder and move around. We rented scaffolding for this part. Operation hide the fiber lights mistake, go!
Airbushed in a huge comet.
Added a kids light up moon the the dome. It turns on/off with a remote.
Plexiglass shelves and LED lighting added under the bar.
Candy is access from the bar side. Lights turn on from a switch on the wall.
I scoured internet for decent versions of movie posters and printed movie poster parts to adhesive vinyl and stuck these to foamcore panels. Then cut them out.
Stuck to foamcore
Cutting around the prints in foamcore. Then set together using 10lb double stick tape and spacers to give it a 3D look.
Initial layout before putting it all together.
All put together and attached to a frame. I also added rope lighting which I forgot to get a picture of.
Testing the look and the back lights.
Prepping the moving parts and getting the motors installed behind the collage. Gives the sign a small bit of movement.
On the wall, motor clearances is ok and lights work.
The full collage is together. Here is a Video of the collage in motion. Obviously we picked movies we like. I started with all blockbusters through history and changed to personal movies as I started cropping. No idea how Grease stayed in there. It should have been Grease 2 if it were personal favorites, oh well, nothing wrong with Olivia I suppose.
Love groin ceilings but this one is too boring.
Much better with some metallic copper paint.
Cabinet plans drawn up. Went through many iterations of this design. Bowed out top and bottom. Shelves all the way to the ceiling. Fat shelves, skinny shelves. Fully adjustable, fixed, doors, no doors. Ended with a single fixed shelf on each side for stability, all others adjustable. The boxes on the side became doors with black speaker fabric. Each side contains a sub and extra controllers for game systems. A bulk of the games ended up in the closet adjacent to the bar. Most of the bluray movies still reside in the living room cabinet.
Time to work on the cabinets. Was going to use birch but the birch at the local store seemed pretty warped so we bought 3/4" oak plywood instead (then ruined it by painting).
Not great but capable paint booth.
Testing the fit.
Paint sand paint sand paint sand. Ugh.
Finally coming together.
Added some cabling from the wall to the protruding cabinet as I didn't want to try to connect to the ceiling. I was worried about sag in the center.
Cleaning up some gaps and done.
600 16ft LED strip added around the perimeter of the cabinets/shelves. These turned out to be too bright so I added the optional dimmer to them and now they are perfect, plus the added bonus to brighten them if needed.
I blocked the small bit of extra wash light with some plastic extrusion. Kept the lights from shining on the walls.
Panels can be removed from the top back to get access to the wiring. I have two power strips attached to the wall at the top to make it easier to plug everything in.
Trying different designs of for a sign over the screen. This was over a year before I actually started the cabinet and guessed the size wrong. The sign ended up much larger (barely fits the cabinet) than it was supposed to be but I wasn't going to print another since I already had it.
Absolutely missed taking a pictures of this part. The sign was printed on adhesive vinyl. I found just the right width flashing sheet metal and we attached it to that (without getting sliced up in process). The sheet metal was then bent to match the curve and ends.
Attached the sheet metal sign with small screws and touched up with some black marker..
I didn't like that I could see the rope light when I stood in the bar area so I decided that silhouettes to block the rope. I completely blew it on pics of this step even though we spent a solid 3 weeks cutting the 2mm black Sintra by hand with Xacto knives. I added black trim around the dome and cut a 1/8"x1" out of the back of it to slide the Sintra in. I scaled and printed about 100 things that I thought would be neat around the circumference of the dome to block the light. We placed the images on the Sintra and ran over it with the Xacto knife to score the material then removed the paper and hand cut them out. We both felt like we'd damaged out joints after a few weeks of cutting. Sintra is soft enough and all but 2mm by hand with so many small details took so many cuts and passes..... Looks awesome though so who cares. For the few things floating, those I printed on transparencies, cut them out then pasted to the backside of the Sintra. I painted the bat signal on the dome (there is a tiny Batman on the building). The Sintra pieces range from 6" to 24" long for each section. I blocked any small sliver of light between them with electrical tape.
Right to Left: Seattle, Disney Castle, Gotham, Bugs and Daffy, Godzilla, Peter Pan
Right to Left: Godzilla, Peter Pan, Rome, Indy, Moscow, Tangled Tower, Tinker Bell, Pirates of the Caribbean
Right to Left: Indy, Moscow, Tangled Tower, Tinker Bell, Pirates of the Caribbean, Halo, Despicable Me
Right to Left: Despicable Me, Lord of the Rings, Princess Bride, Mexico, Sleeping Beauty, Aladdin
Aladdin and Jasmine are flying over on the carpet
Right to Left: Mexico, Sleeping Beauty, Aladdin, Walt Disney and Mickey, Washington DC, Clash of the Titans (classic version with tiny Perseus and Pegasus)
Right to Left: Sydney, Little Mermaid, Rio de Janeiro, Star Wars, Kyoto
Right to Left: Kyoto, Super Mario Bros, Egypt, Iron Giant, Paris
Right to left: Paris, Lion King, Hogwarts, 20,000 Leagues Under the Sea, Las Vegas
Hogwarts has a dragon flying overhead and holes to show lights in the castle but they don't come out in the photo.
Right to Left: Little Mermaid, New York, Titanic, London, Legend of Zelda
London has Mary Poppins and the Tardis flying over it.
Added ET to the moon.